The Basics of Scripts
Created: Feb 17 2022 || Edited: Feb 22 2022
Created: Feb 17 2022 || Edited: Feb 22 2022
Scripts
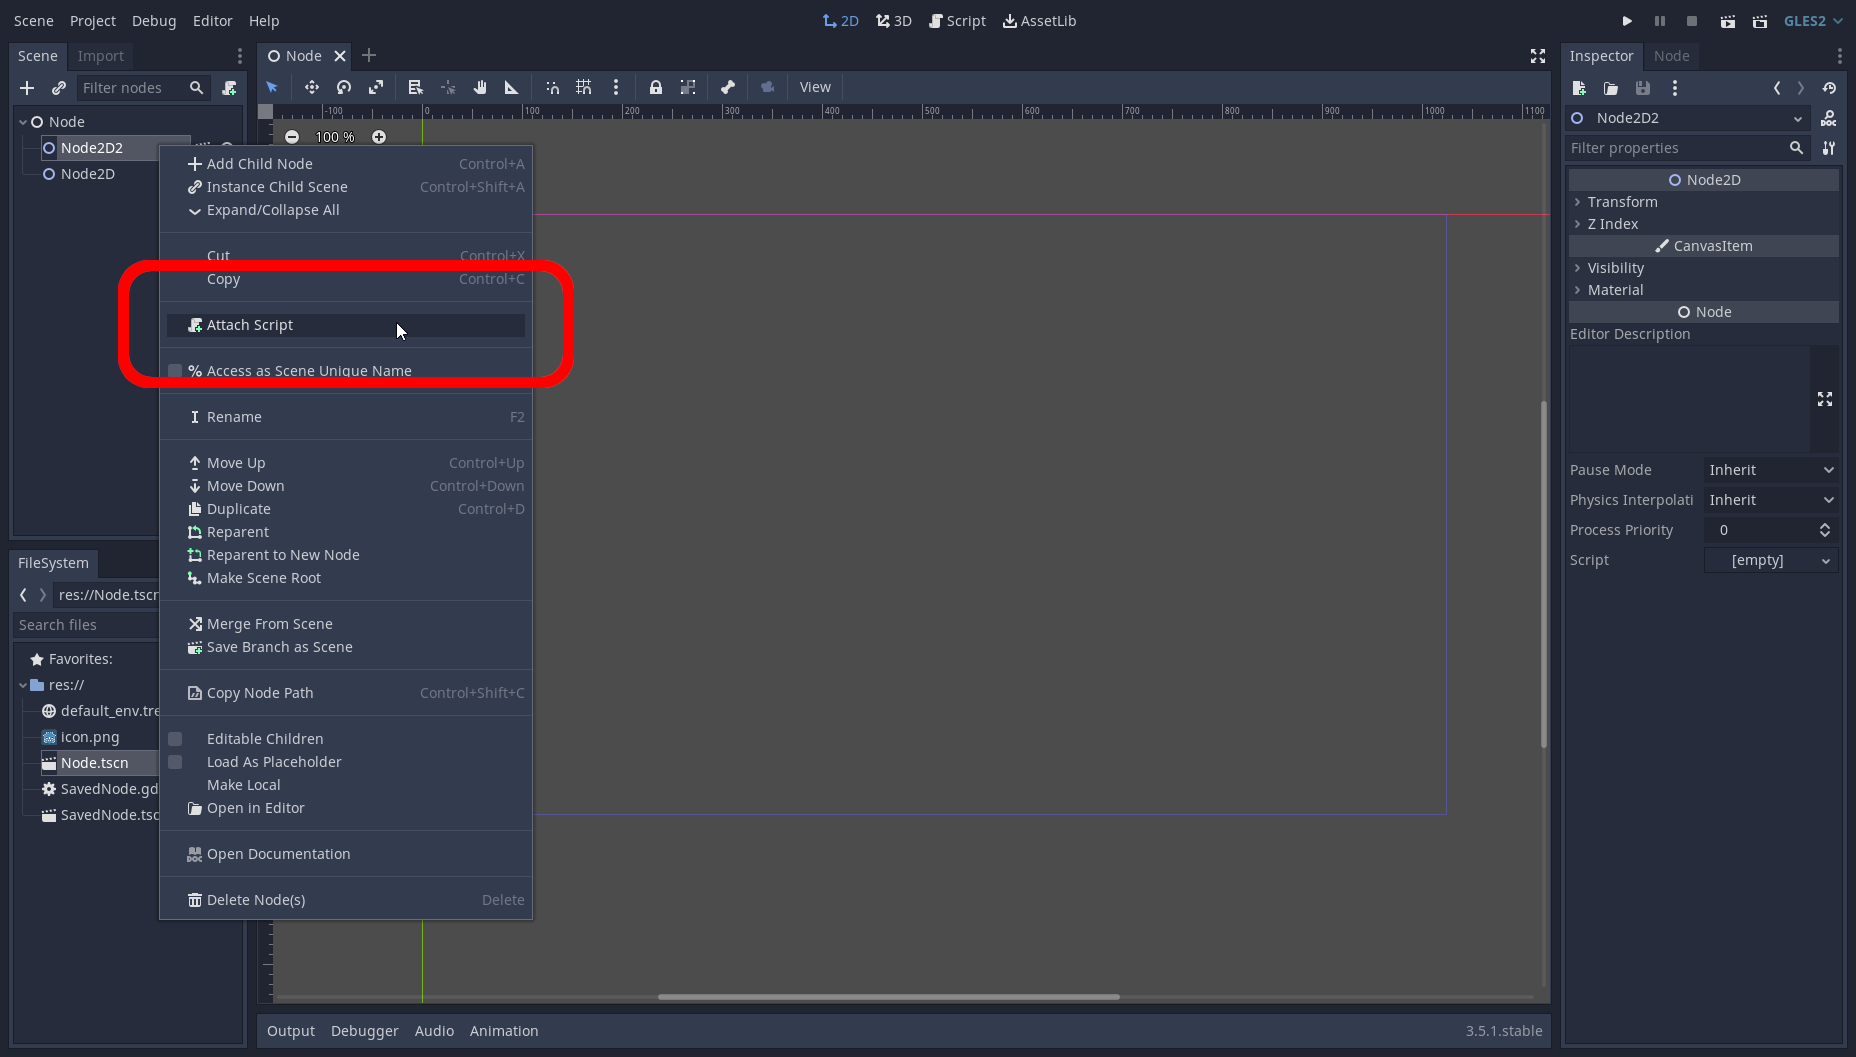
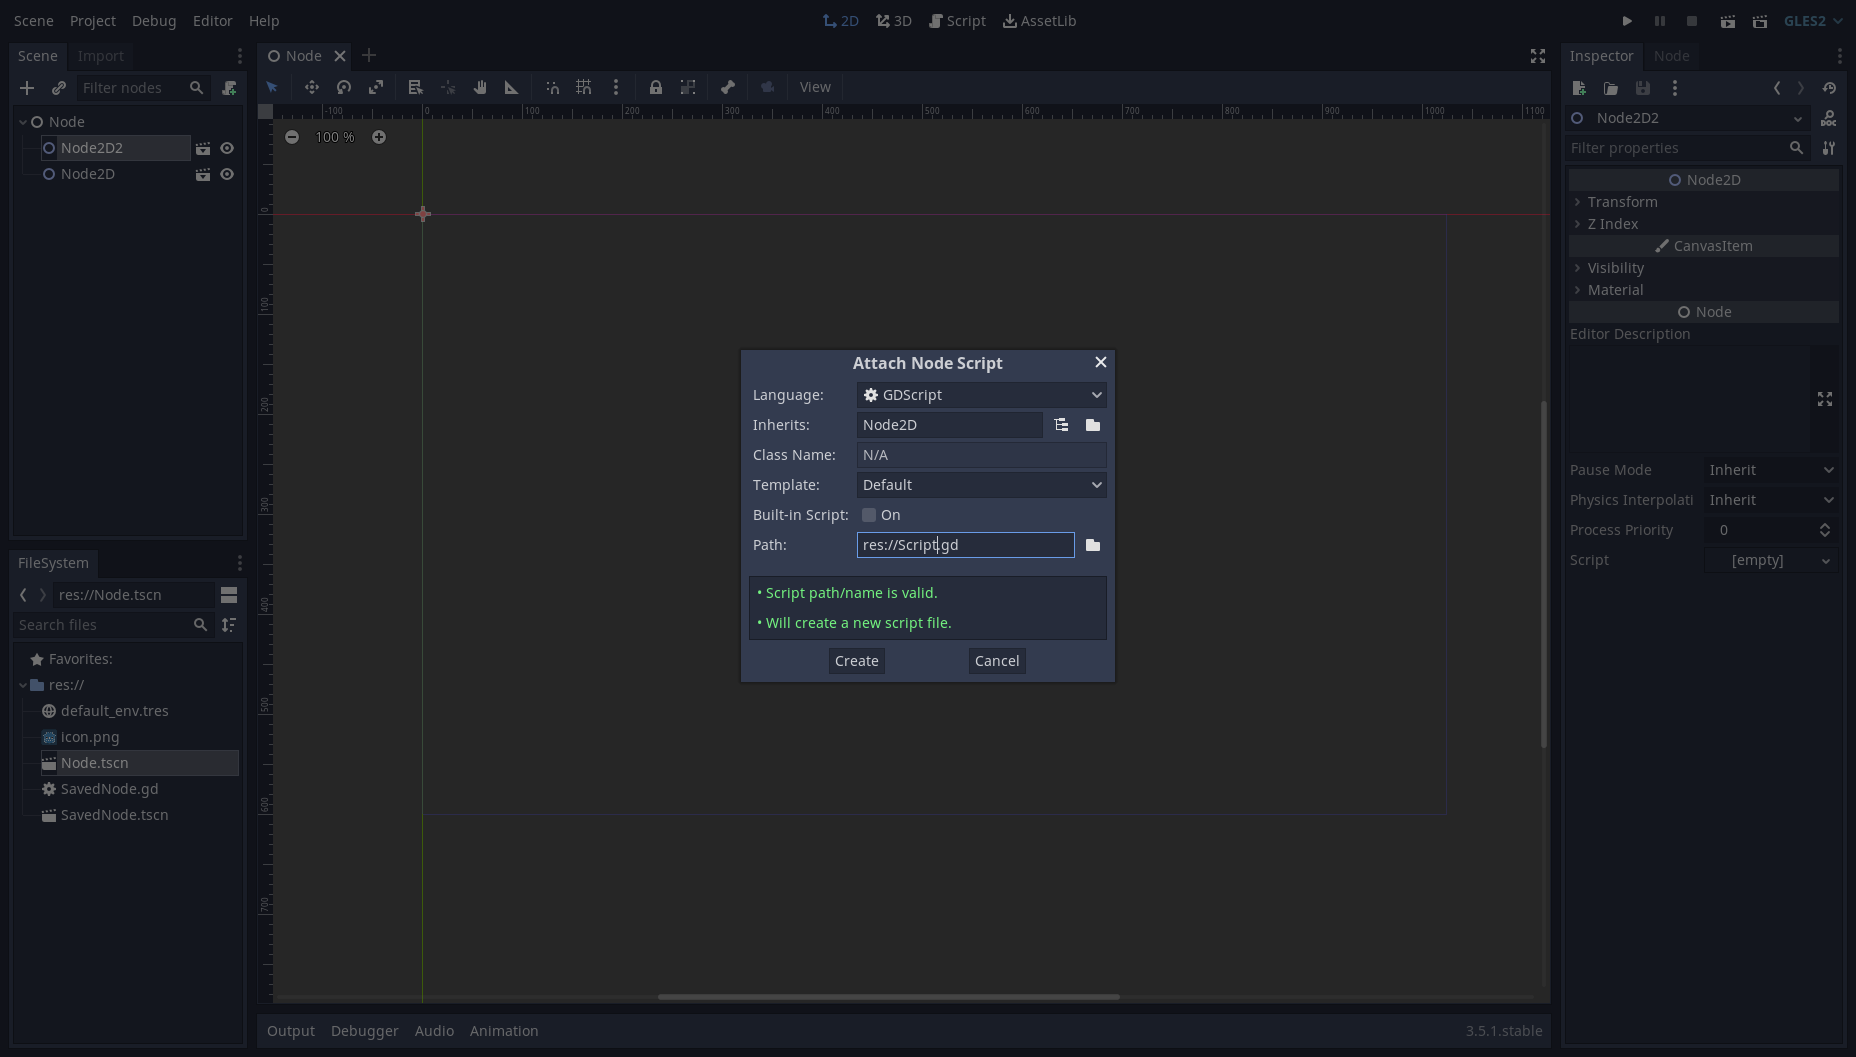
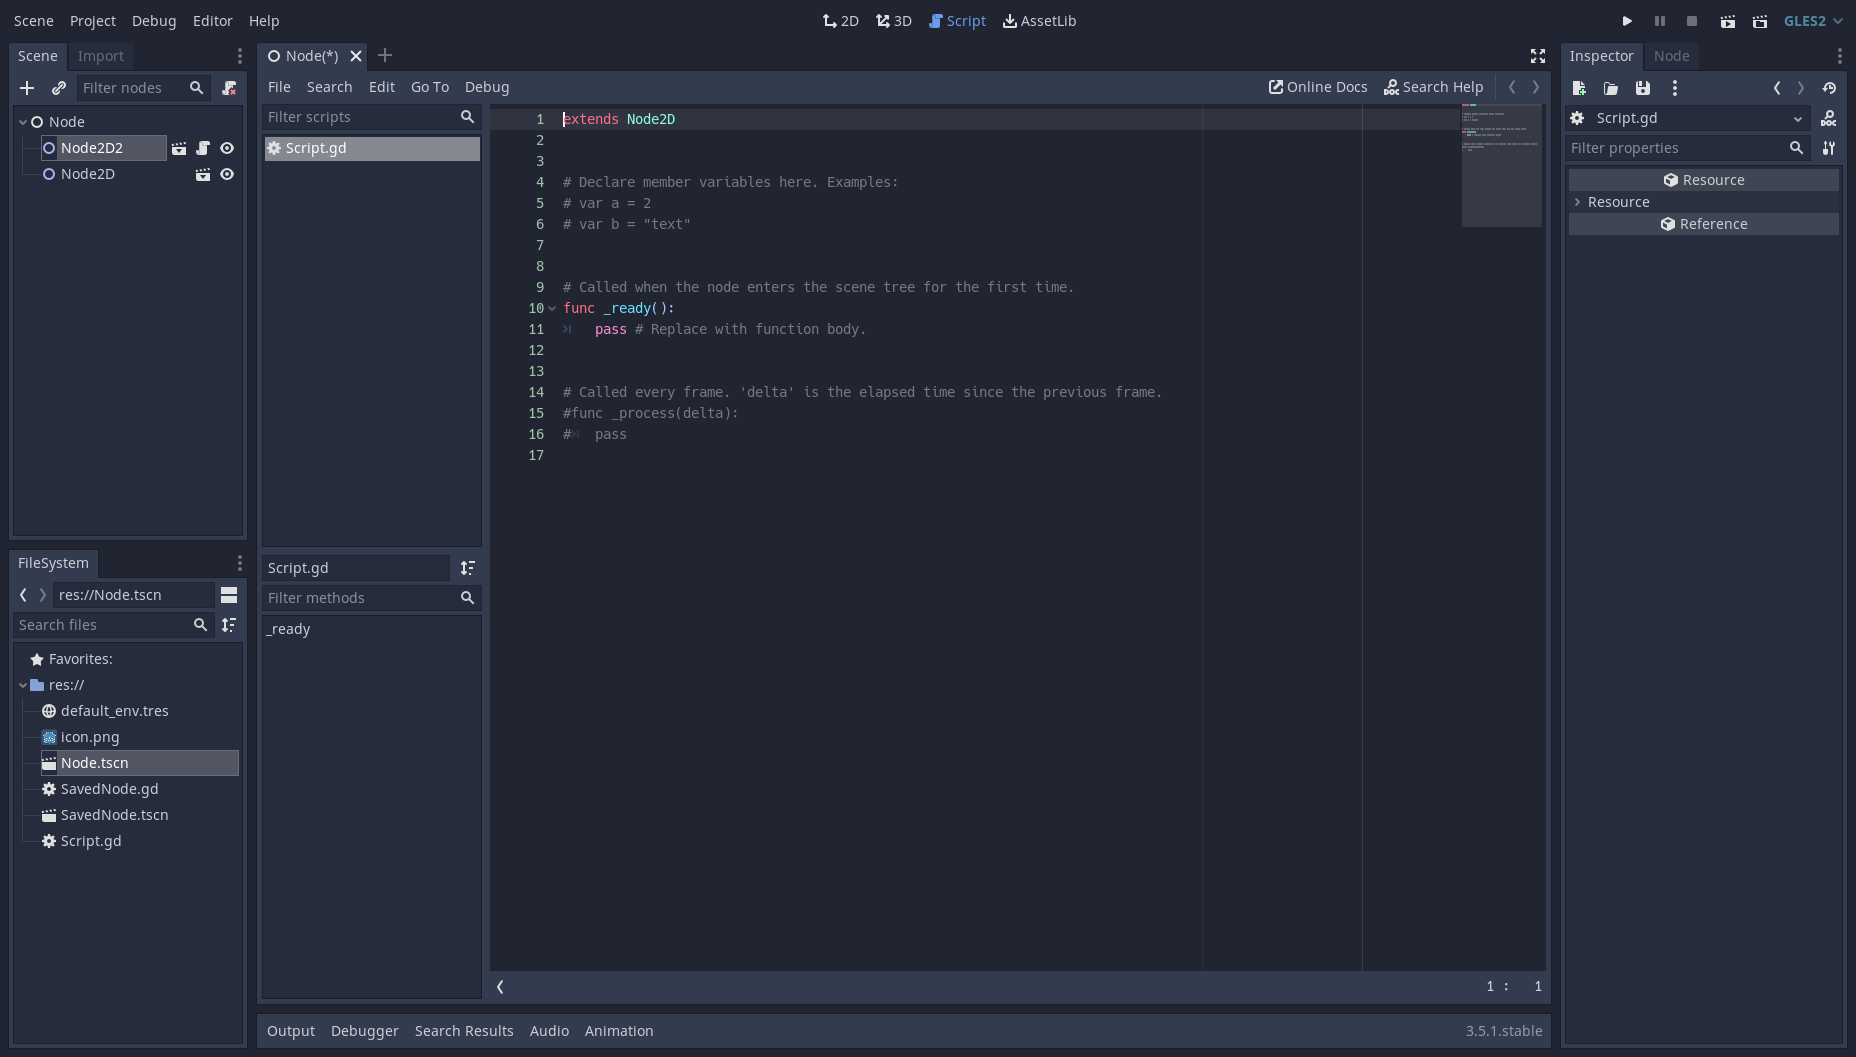
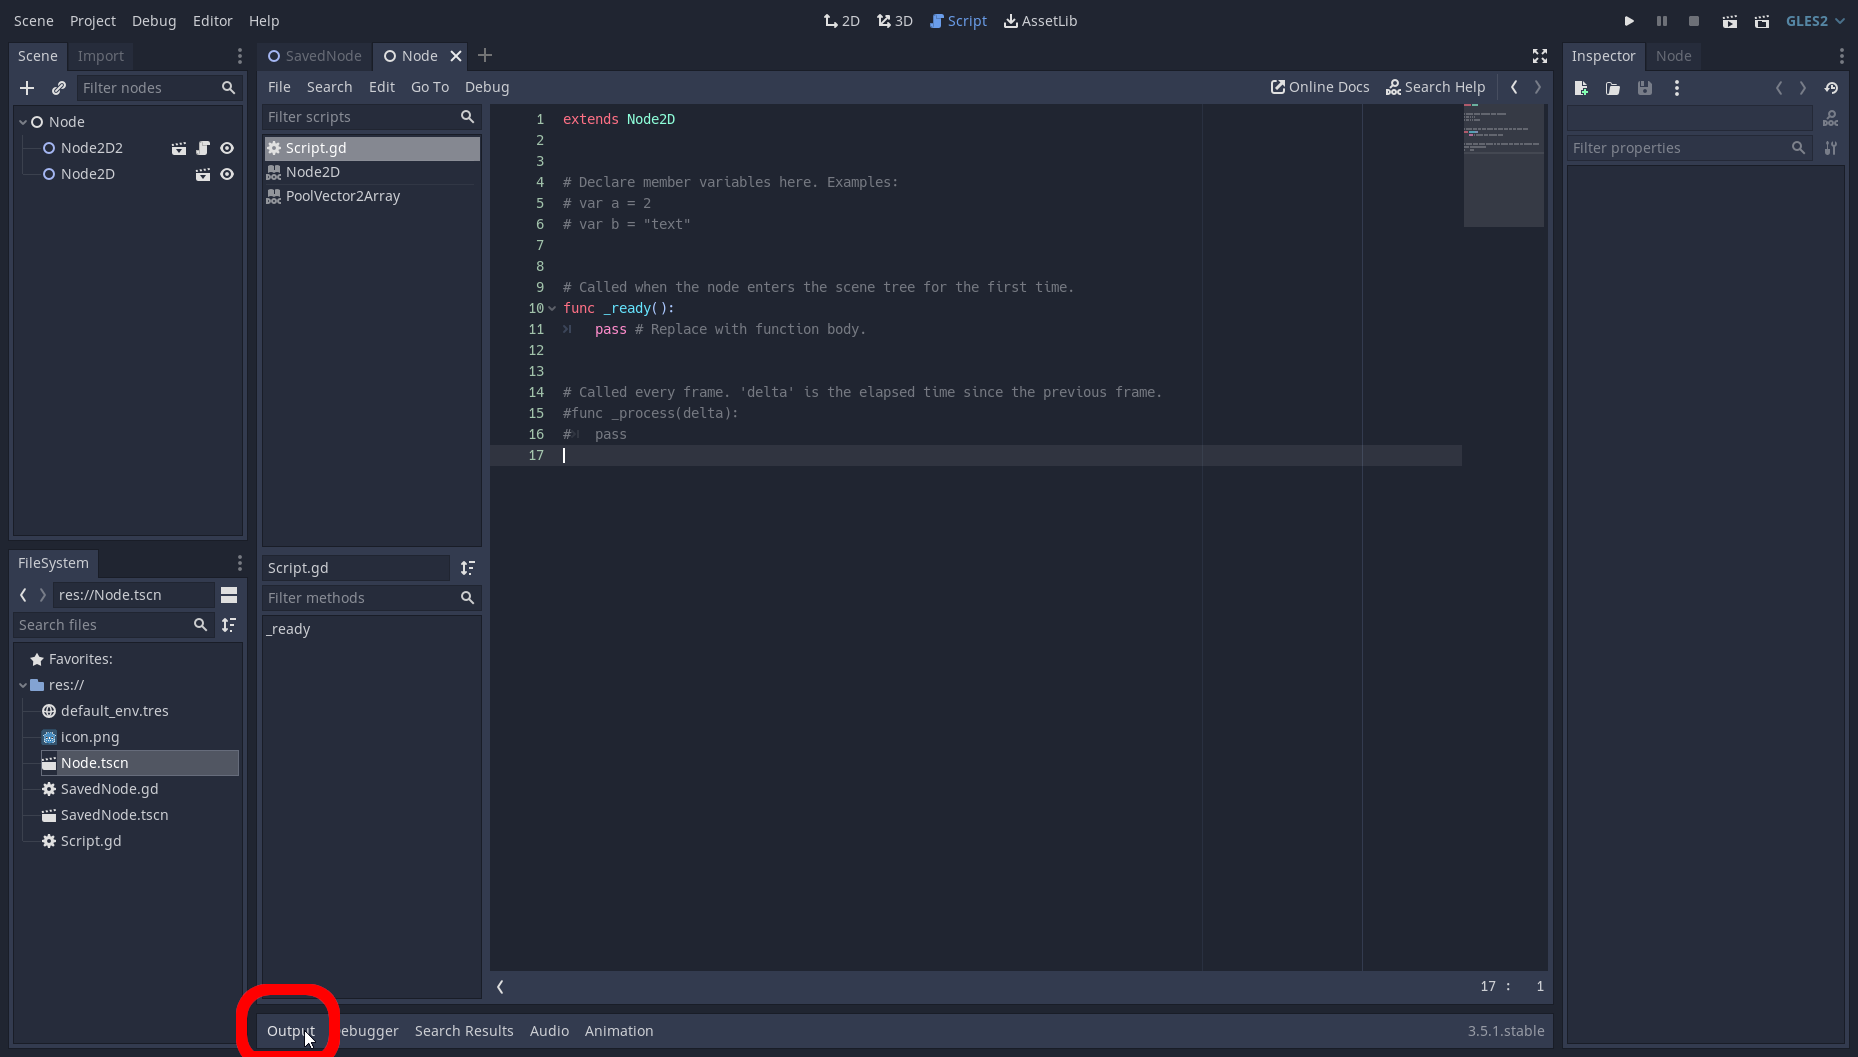
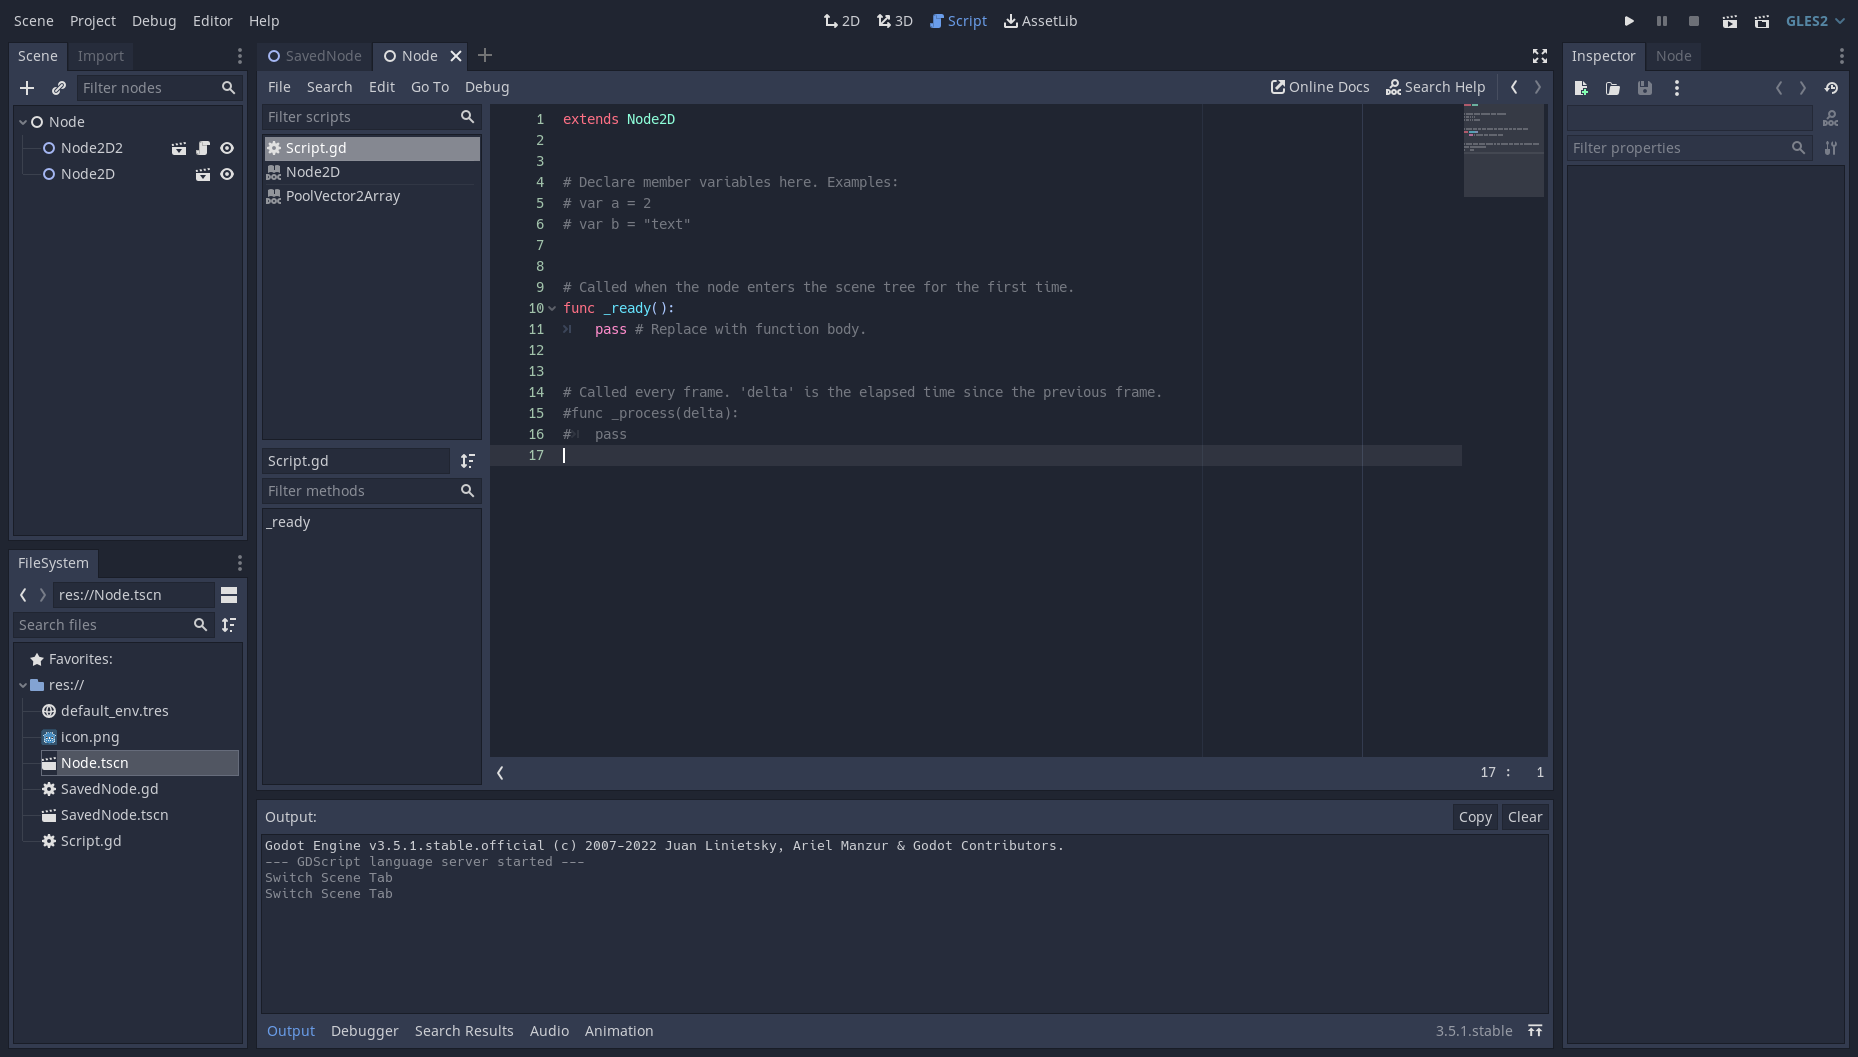
So the next thing we're going to be learning about scripts in Godot. Currently there's 3 main integrated ways to use scripts, GDScript, VisualScripts, and C#. We'll be using GDScript for now, as it's a bit easier to learn and used more often. >> What's a script? >> Inside a script >> Variables >> Functions >> Let's add functionality What's a Script? A script is a way to manipulate values within Godot, as well as capture data, like keyboard/controller input, and then use it to control things. To create a script, we can right click a node and click "Attach Script" After this point, you will be greeted with a new menu. Yes, Godot likes its menus it would seem. This menu will appear every time you'd like to create a new script, unless you create one via the "FileSystem" tab. As you can see there are various settings, the most important ones are as follows: > Language: Lets you change what language basis you'd like for the script. > Inherits: This is the overall node the script will inherit from, basically giving you quick access to it's abilities by default, it's recommended you keep this default when spawning a script this way. > Path: This where you save and name your script, if you save over a script, this one will become that one. For now though, we're just going to keep the default settings, but feel free to name your script something you can remember for later, as it will be somewhat important. And.... It looks like our whole view switched again! This time we've ended up in the "Script" tab along the top of the screen. So this is the default script any-time you create a new one. Inside a script So let's break down what we're looking at here. To start, the script has "extends Node2D", what the heck is this? Well, this is what your script is using for a referencing base, so any attribute that Node2D has, you can manually grab it from it. The "extends" portion is required for a script to function, as it essentially is what connects it to the engine, if you don't know what to use, default to "Node". If you'd like to see what the node is capable of, hold Control+Left Mouse Button on the "Node2D" next to "extends". This should open the Documentation page on the node. If you need help with stuff, most of us call them the "Docs", (you don't have to call them that), but most experienced users call them that. The community has put alot of time and effort into helping fill out most of the information on them, so feel free to use them when you're stuck or need help, as they are an extremely helpful resource. Next, we have a few bits of text with "#" next to them, this symbol is for creating Comments, which are essentially just a way to add text that has no functional value, but allow you to explain things, or make certain portions of code non-functional. After the line of text explaining what to do, there's 2 comments with "var" in them, you can uncomment these by deleting the "#" symbol. This turns these lines into useable code, or in this case, two Variables.#var a = 2 #var b = "text" -v- Commented to Uncommented -v- var a = 2 var b = "text"Variables So what's a variable? A variable can be thought of like an object with a specified value to it, in the examples given "a" is equal to 2, and "b" is equal to "text". That leads to the next question. What can be a variable? Well, more or less anything in Godot can be a variable, but the most important value types are as follows: Str/String: A string is a line of text surrounded by either "" or '', and can be used for things like dialogue, or text on the screen. Example:# This is an example for a string. var ExampleString = "This is a line of text." var ExampleString2 = "This is also a line of text."Int/Integer: An integer is a whole number without a decimal point in it. Example:# This is an example for an integer. var ExampleInt = 1 var ExampleInt2 = 3473573 var ExampleInt3 = 300Float: A float is similar to an integer, but has a decimal, also known as a "Floating Point". Example:# This is an example for a float. var ExampleFloat = 1.0 var ExampleFloat1 = 3.14956 var ExampleFloat2 = 6000.00300030003Arr/Array: An array is essentially a list with number values appointed to a position, which can hold variable subtypes, these do not all have to be the same. Arrays in Godot start on 0. If it uses [ ] it is an array. Example:# This is an example for an array. var ExampleArray = [ 123 , "Test" , 99.5 , [ "InnerArray" ] ] # Access with ExampleArray[#] # "InnerArray" can be accessed with ExampleArray[3][0]Dict/Dictionary: A dictionary is essentially a more complext array, it allows for named values rather than just number values, but can do similar stuff to arrays in different format. If it uses { } it is a dictionary. Example:# This is an example for a dictionary. var ExampleDictionary = { "ValueKey1" : 1, "ValueKey2" : ["TestArray"], "ValueKey3" : { "InnerValueKey": 100, } } # Access with ExampleDictionary["KeyName"] # "TestArray" can be accessed with ExampleDictionary["ValueKey2"][0] # "InnerValueKey" can be accessed with ExampleDictionary["ValueKey3"]["InnerValueKey"]Whew, this stuff is alot, but, there's still a little bit more left to go with learning what's in this script. Functions So, the next thing we'll see after the variables, is a function. What does it do? A function in its simplest form, is a way to call a group of code for you to run from a location in your script. We can establish a function like so:# This is an example function. func TestFunction(): pass #To call this function we do this: TestFunction()Well that was simple enough wasn't it? So, let's look back at our script. You may notice the first function is uncommented, this is _ready(). _ready() is one of the various functions that are automatically built into Godot. It's ran when the script itself is "ready" to run, seems simple enough right? The function in the comments after it is _process(). It's ran when the engine updates the frames for the game, so if you have 60 frames per second, _process(delta) will run 60 times. The "delta" is the time between this frame, and the previous frame, this is a function variable, you can just call "delta" in your code to use it. You may be wondering about the "pass" text under both of these, this is a simple placeholder to tell Godot where the code for a function actually stops, as Godot doesn't like having empty functions sitting out in the open and it establishes the tabbing space. These two are some of the few built-in functions Godot has, a list of some important ones are as follows: _ready(): This ran when a script is "ready". _process(delta): This ran when the frame changes in Godot. _physics_process(delta): This is ran when the physics are updated in Godot. _input(event): This is for when you press a key, click a mouse, etc. It updates whenever something in the input is pressed. This is used for capturing input, but also getting mouse movement and other things. It's alot I know, but we're done figuring out what's going on with this script now. Some of this stuff may not seem important now, but you'll likely run into them in the future. So it's good to know about them beforehand. Let's add functionality Since the next topic in this series is going to be about running our game. I think it would make sense to have our game actually do something so that we can see the evidence of it actually "running". To do this, we're gonna add some text to print in the debug console. "What is this?", you might ask, well it's a small console for that you can use for getting visual queues using text. You can access it by going to the very bottom of your screen, and clicking "Output". This tab normally opens by itself when you run the game through the editor, so you don't have to worry too much about manually opening it, but it is nice to be able to close it sometimes. So what do we do now? Let's add the functional code. Under the _ready() function, we're going to add print(). It should look a little something like this:func _ready(): print() passDon't forget to properly add tabs! The scripts won't run properly unless you tab your code properly. Next step, inside the () of print(), we're going to add some text, we'll want to use a string this time.func _ready(): print("Hello World!") passSeems pretty easy. So what will this do? print(text) is a function that we call when we want to test values, or show something is working, it's a function that every node has, so you can use it whenever you need it! If you need to see if a certain area of code is working, just throw a couple in around your code, and you can use them as if they were checkpoints. And that's all of the basics of scripting! Like the basic basics, there's always more to learn. Now that we have something to make our code do, the next section will actually cover running the game, so we can see what it will do!
