Running & Exporting
Created: Feb 22 2022 || Edited: Feb 22 2022
Created: Feb 22 2022 || Edited: Feb 22 2022
Prev <
|| > Next
Running
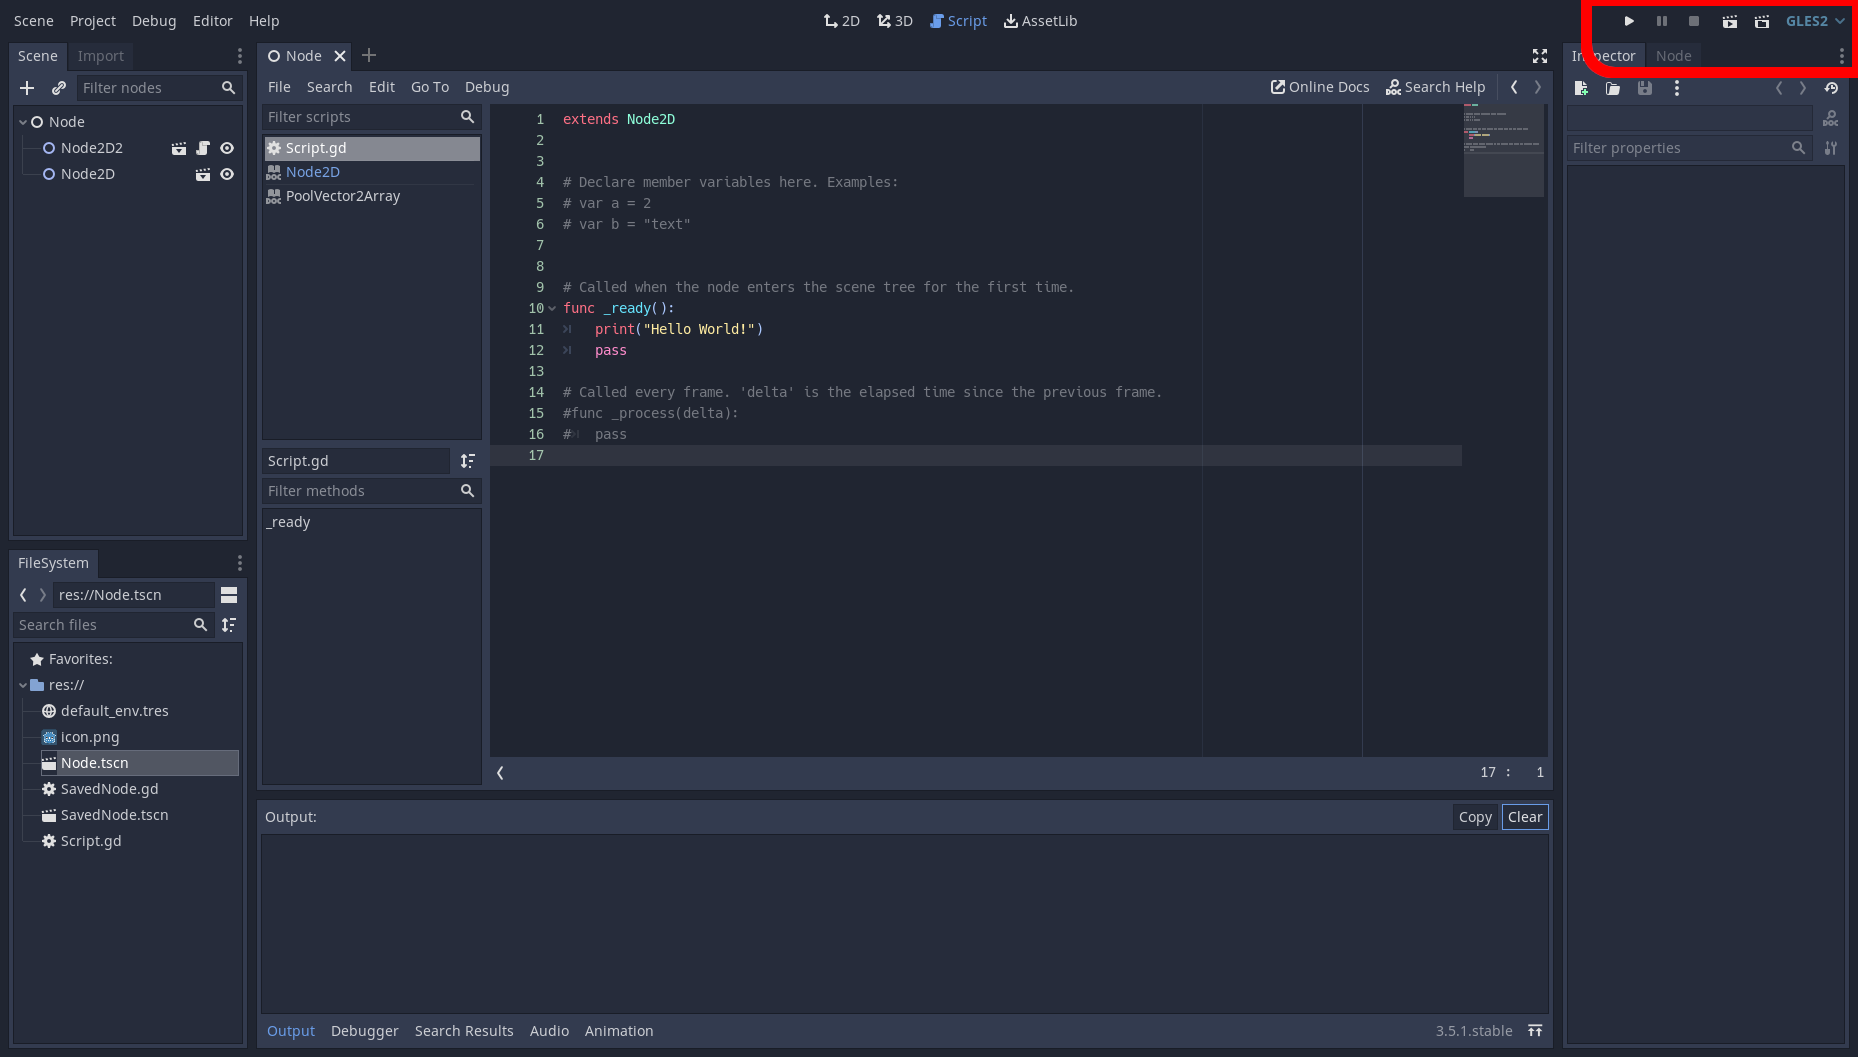
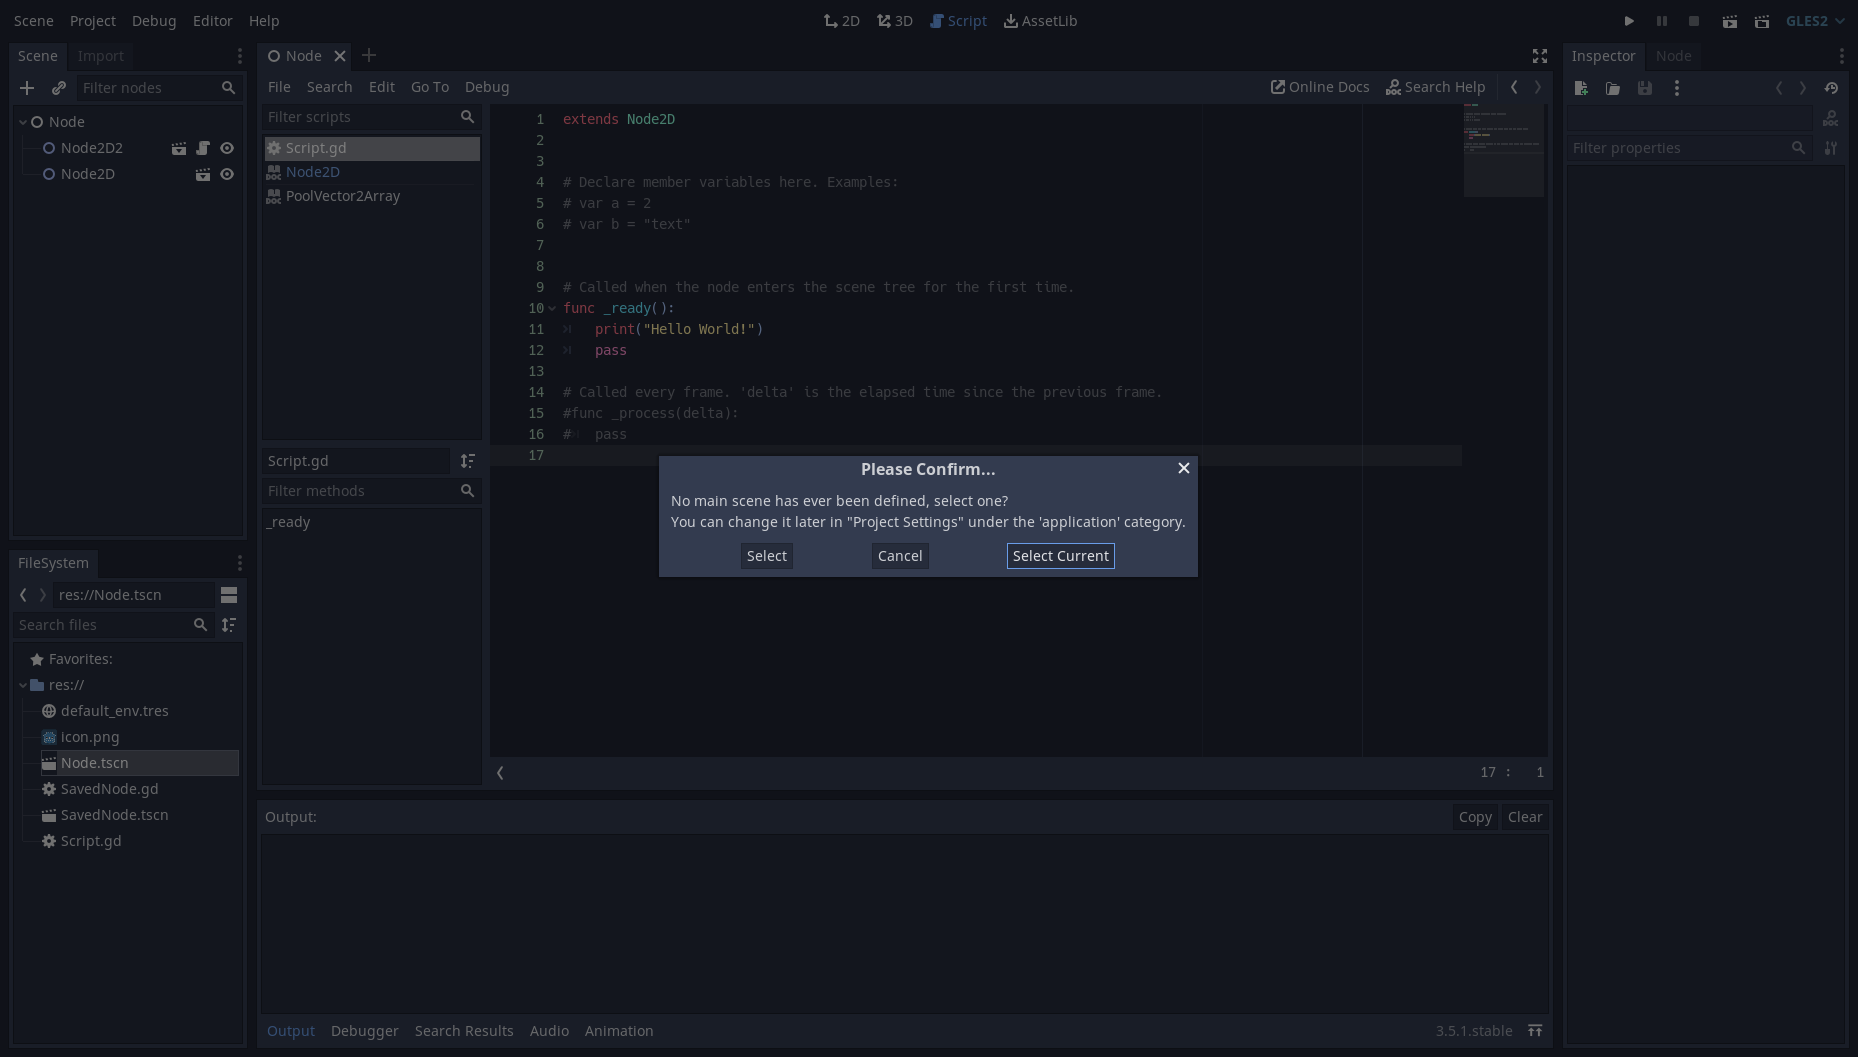
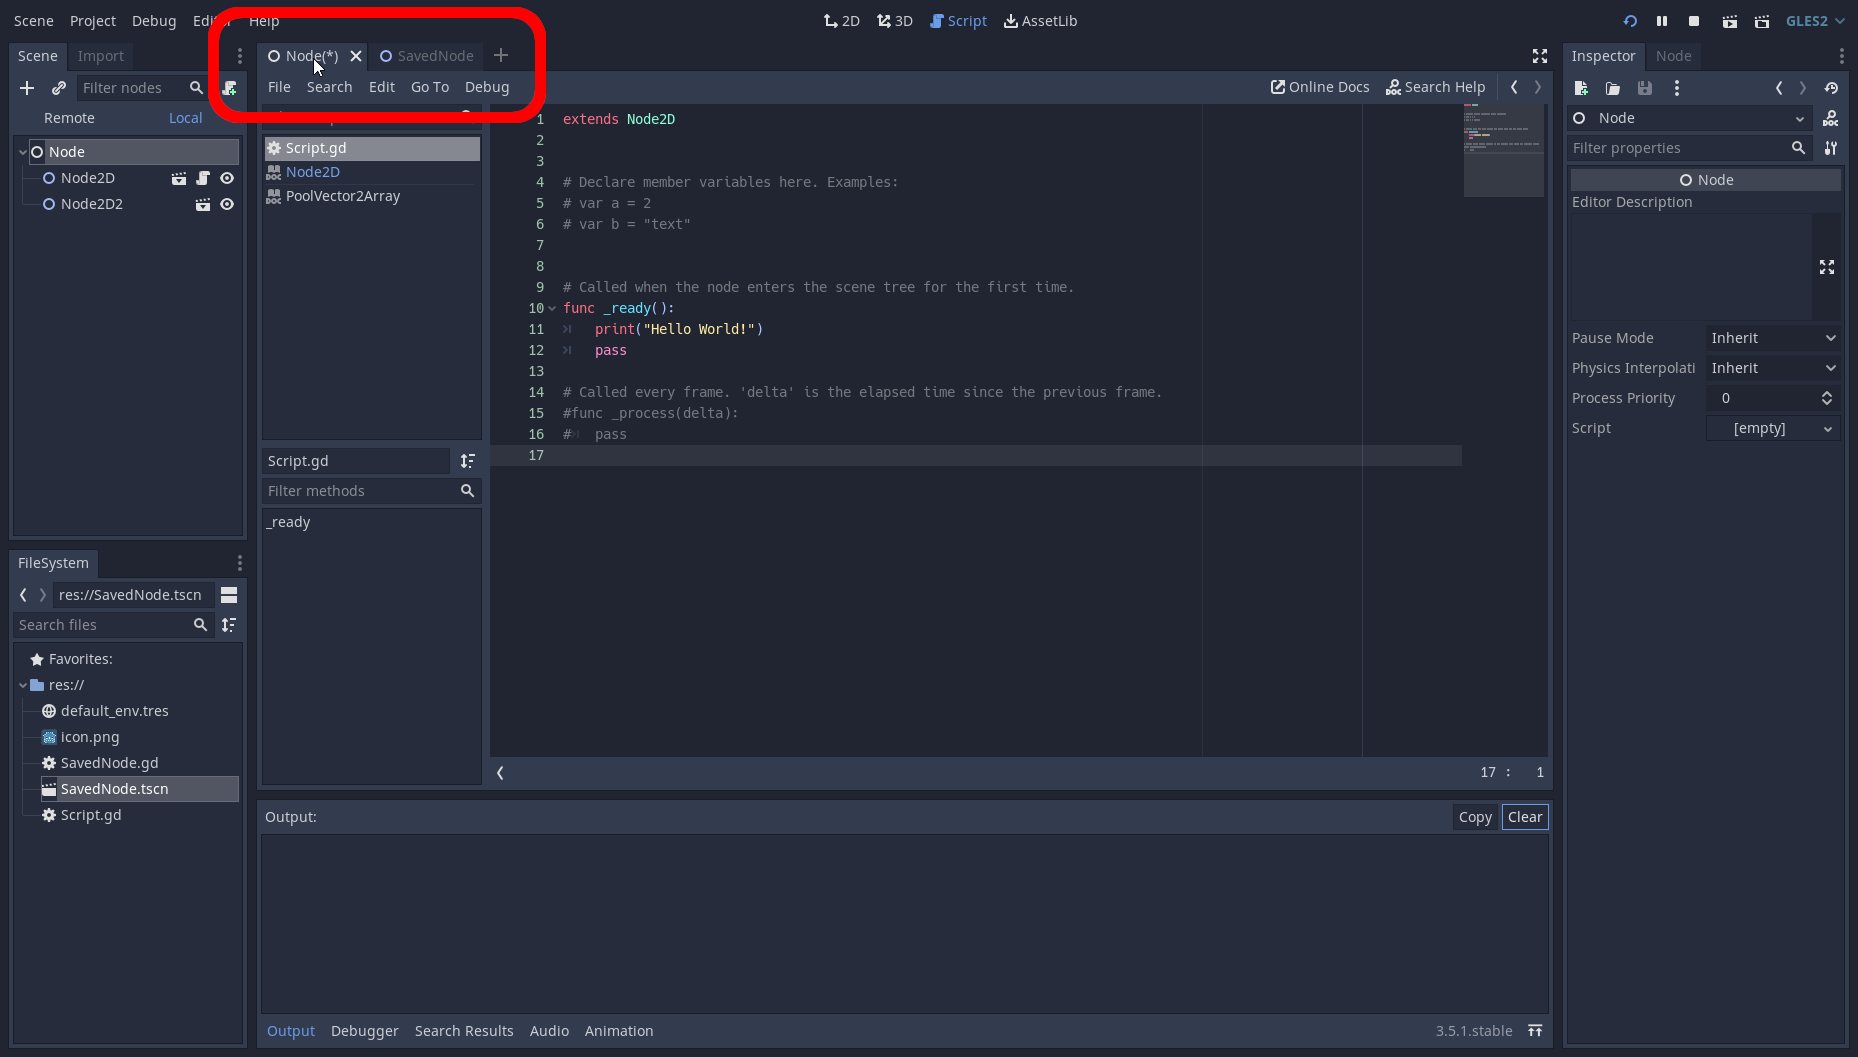
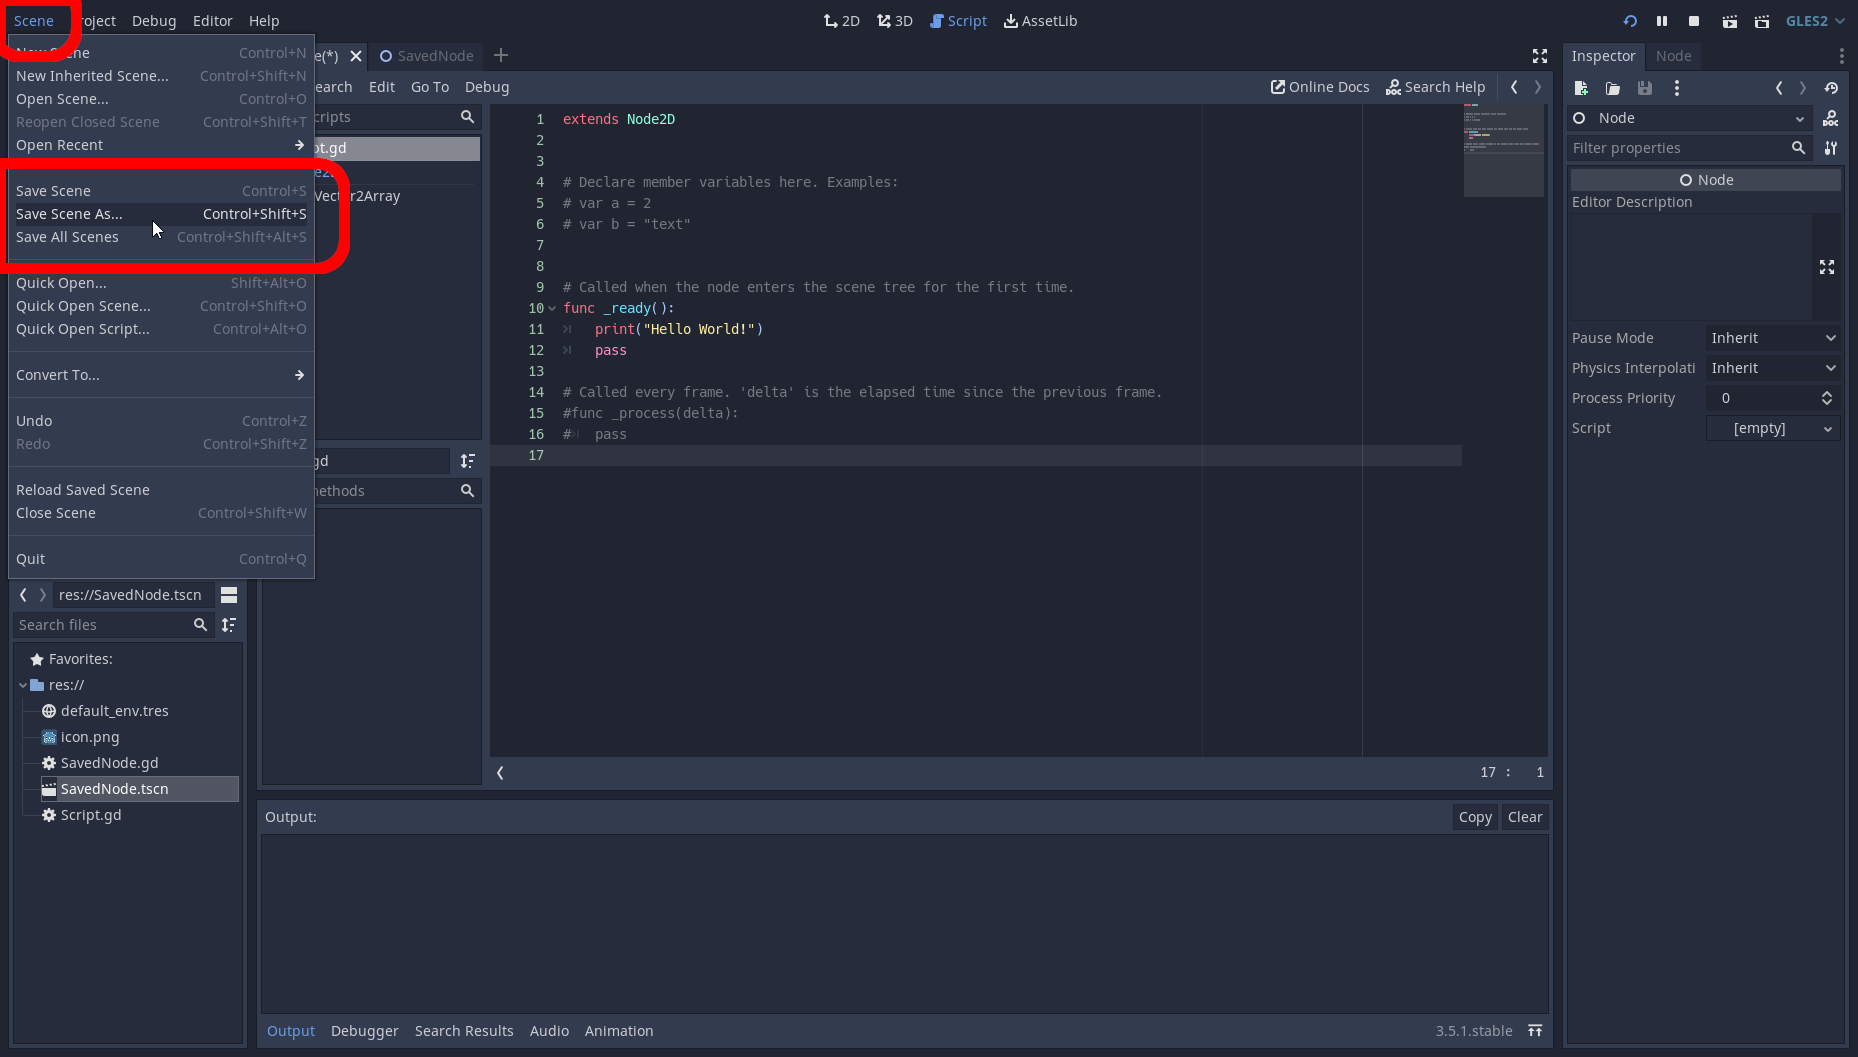
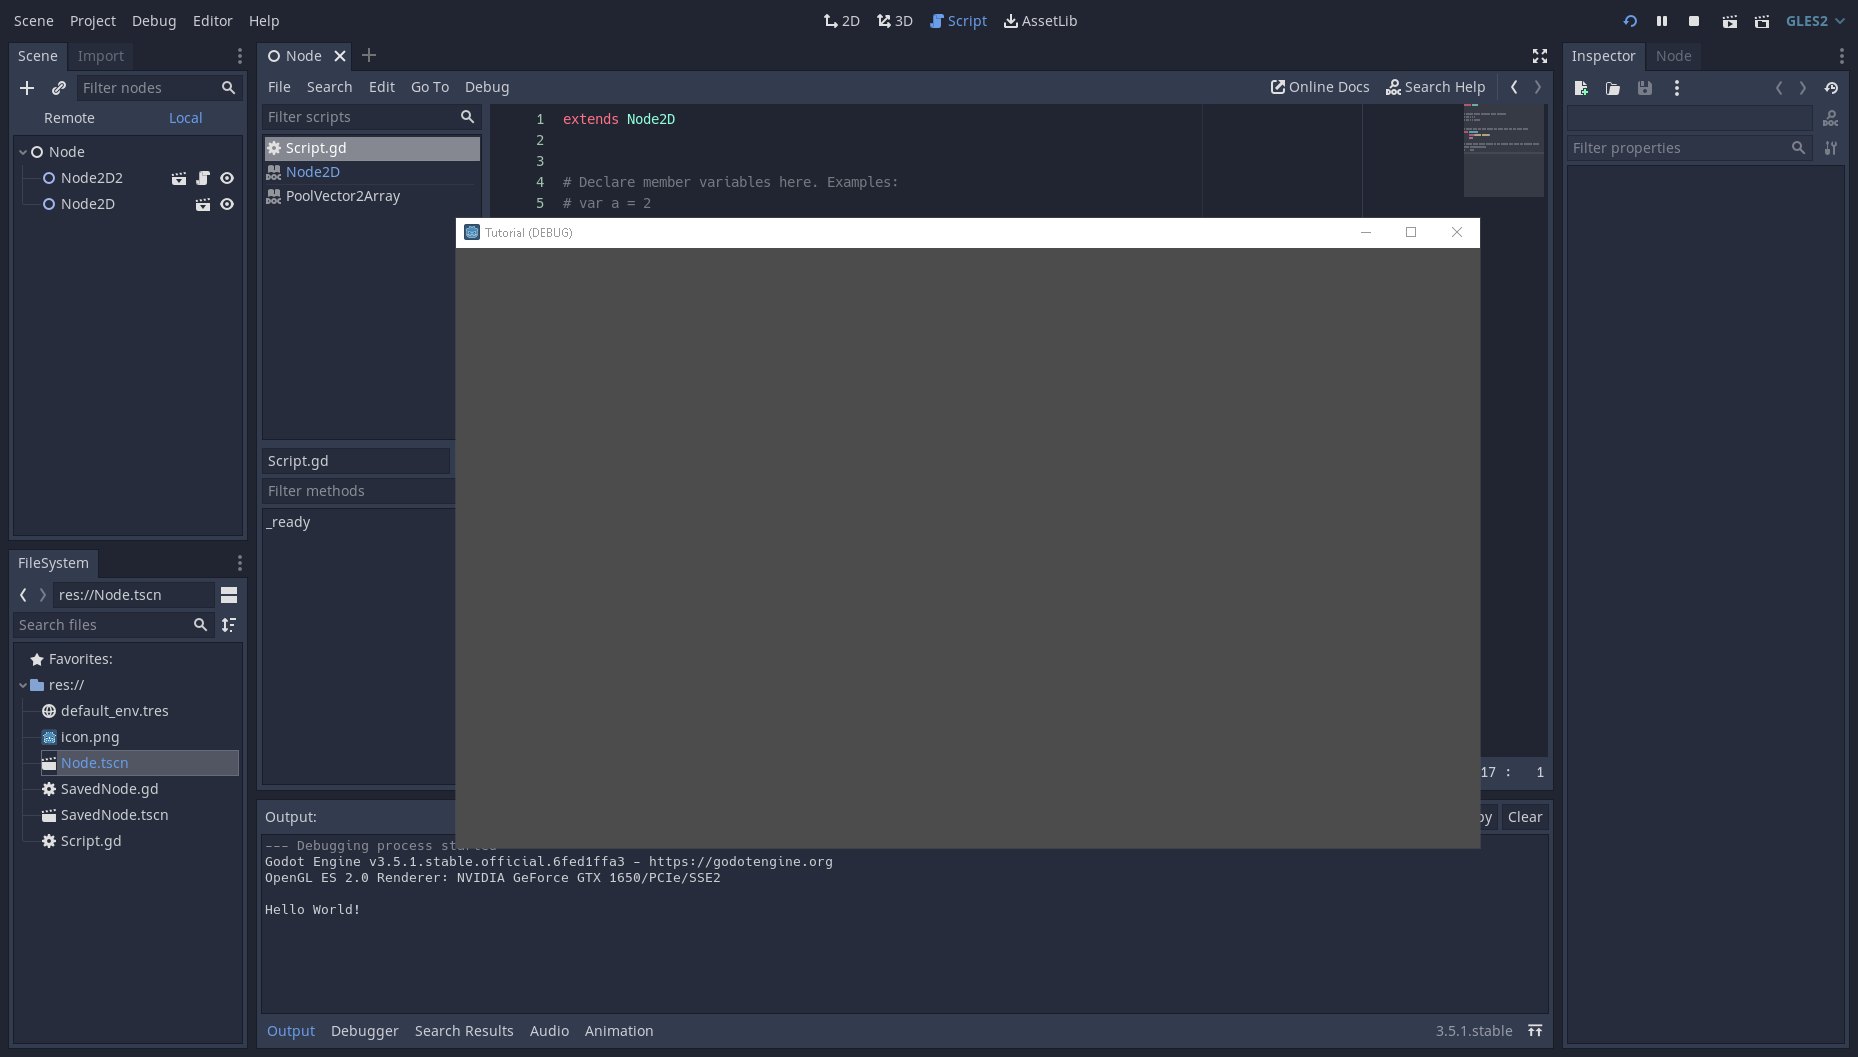
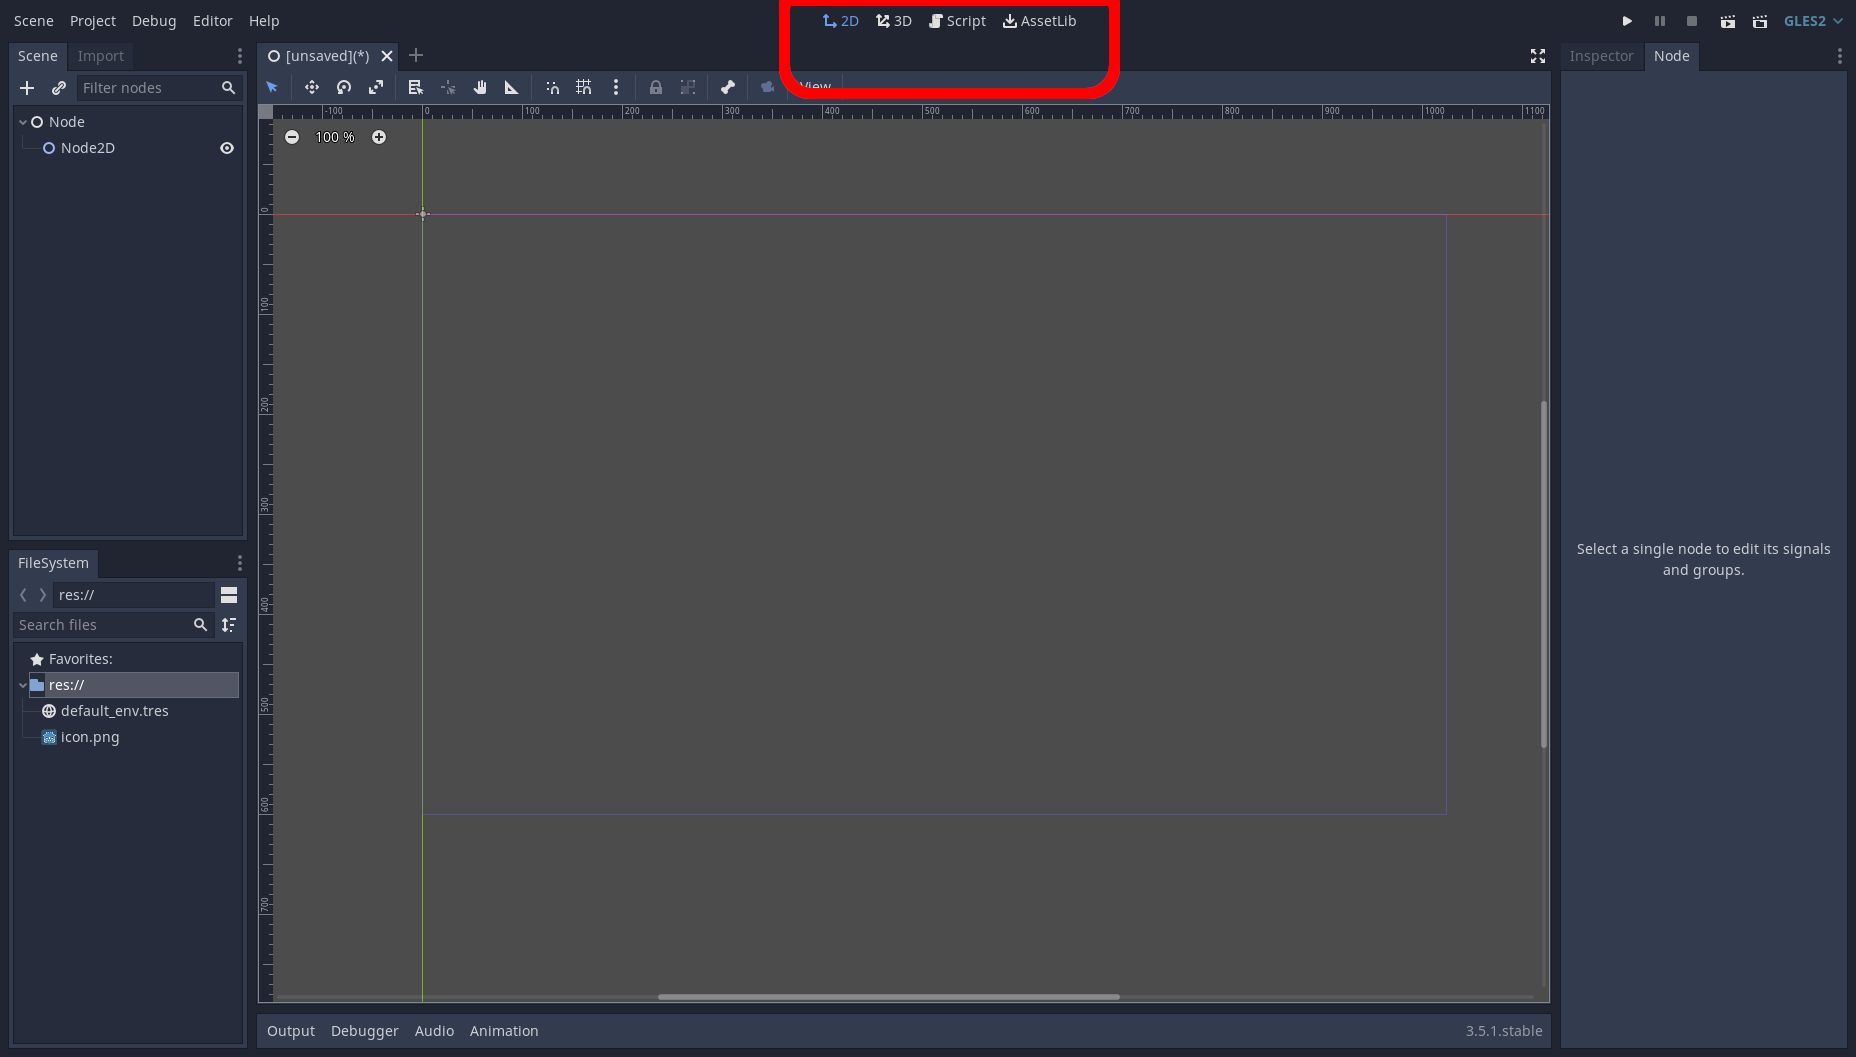
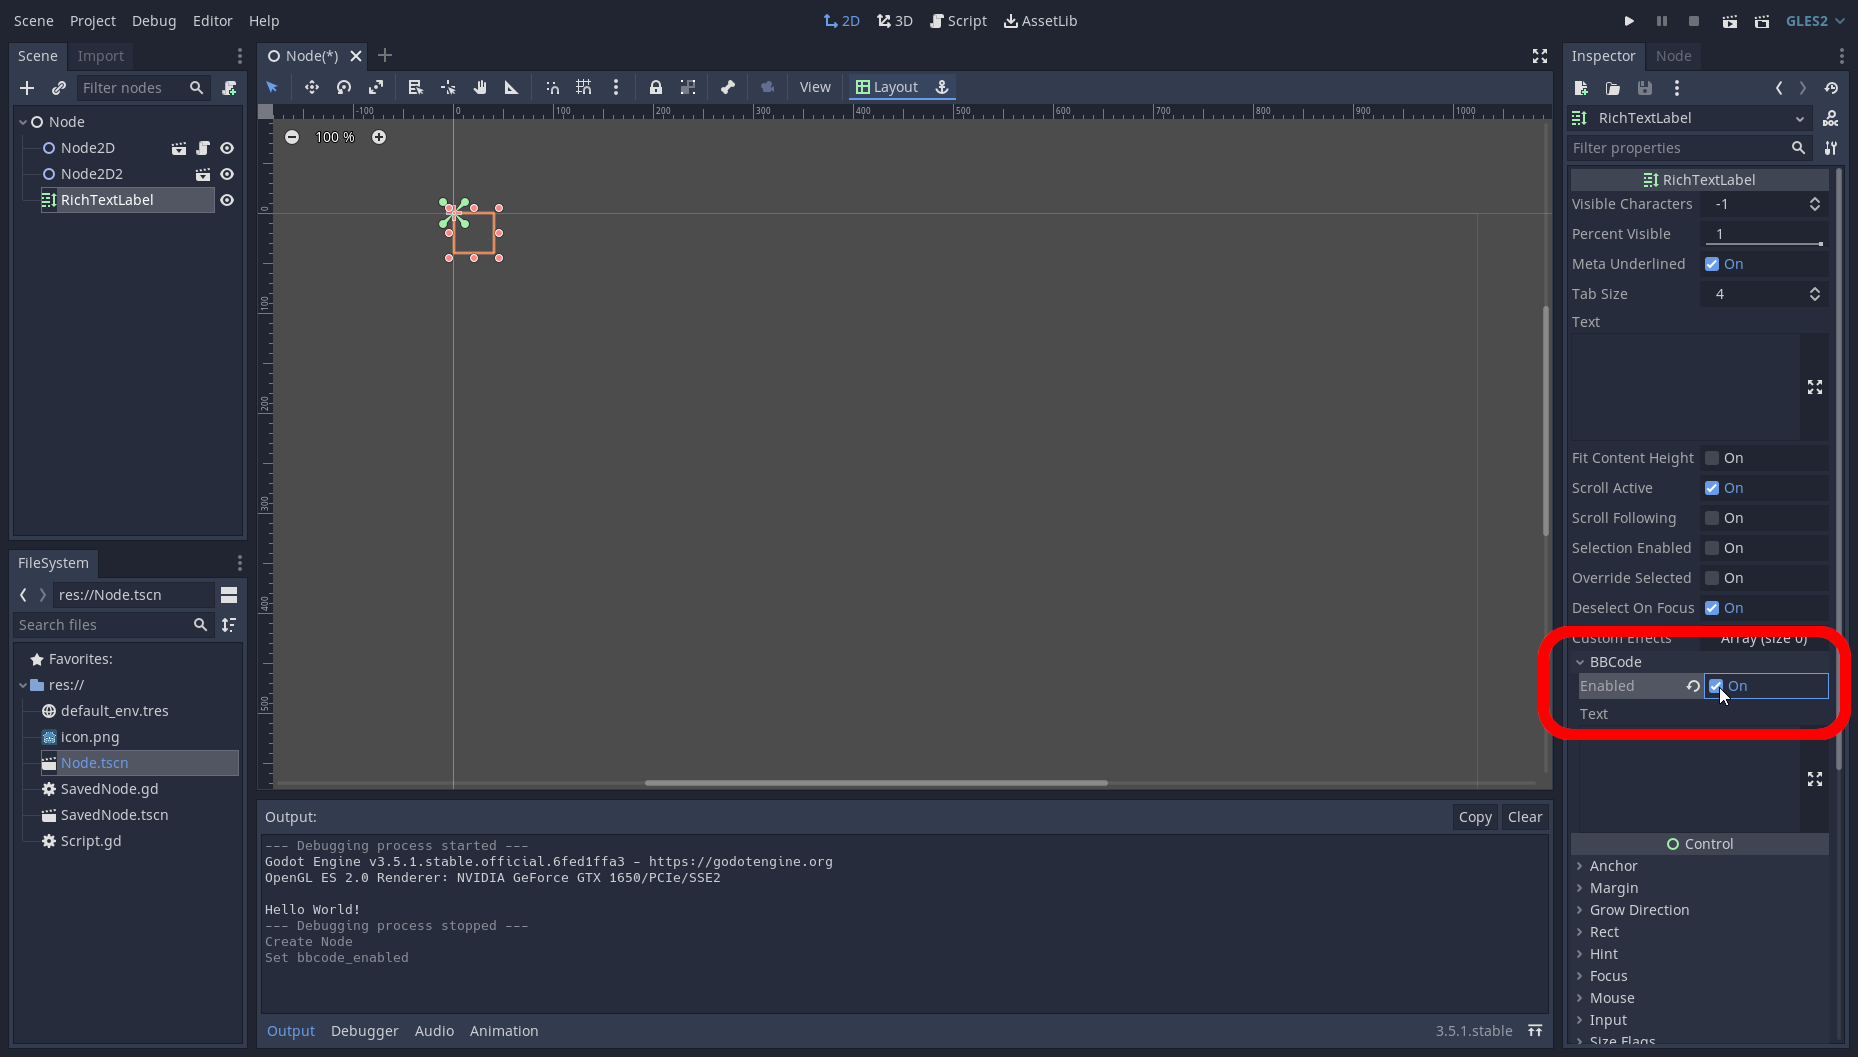
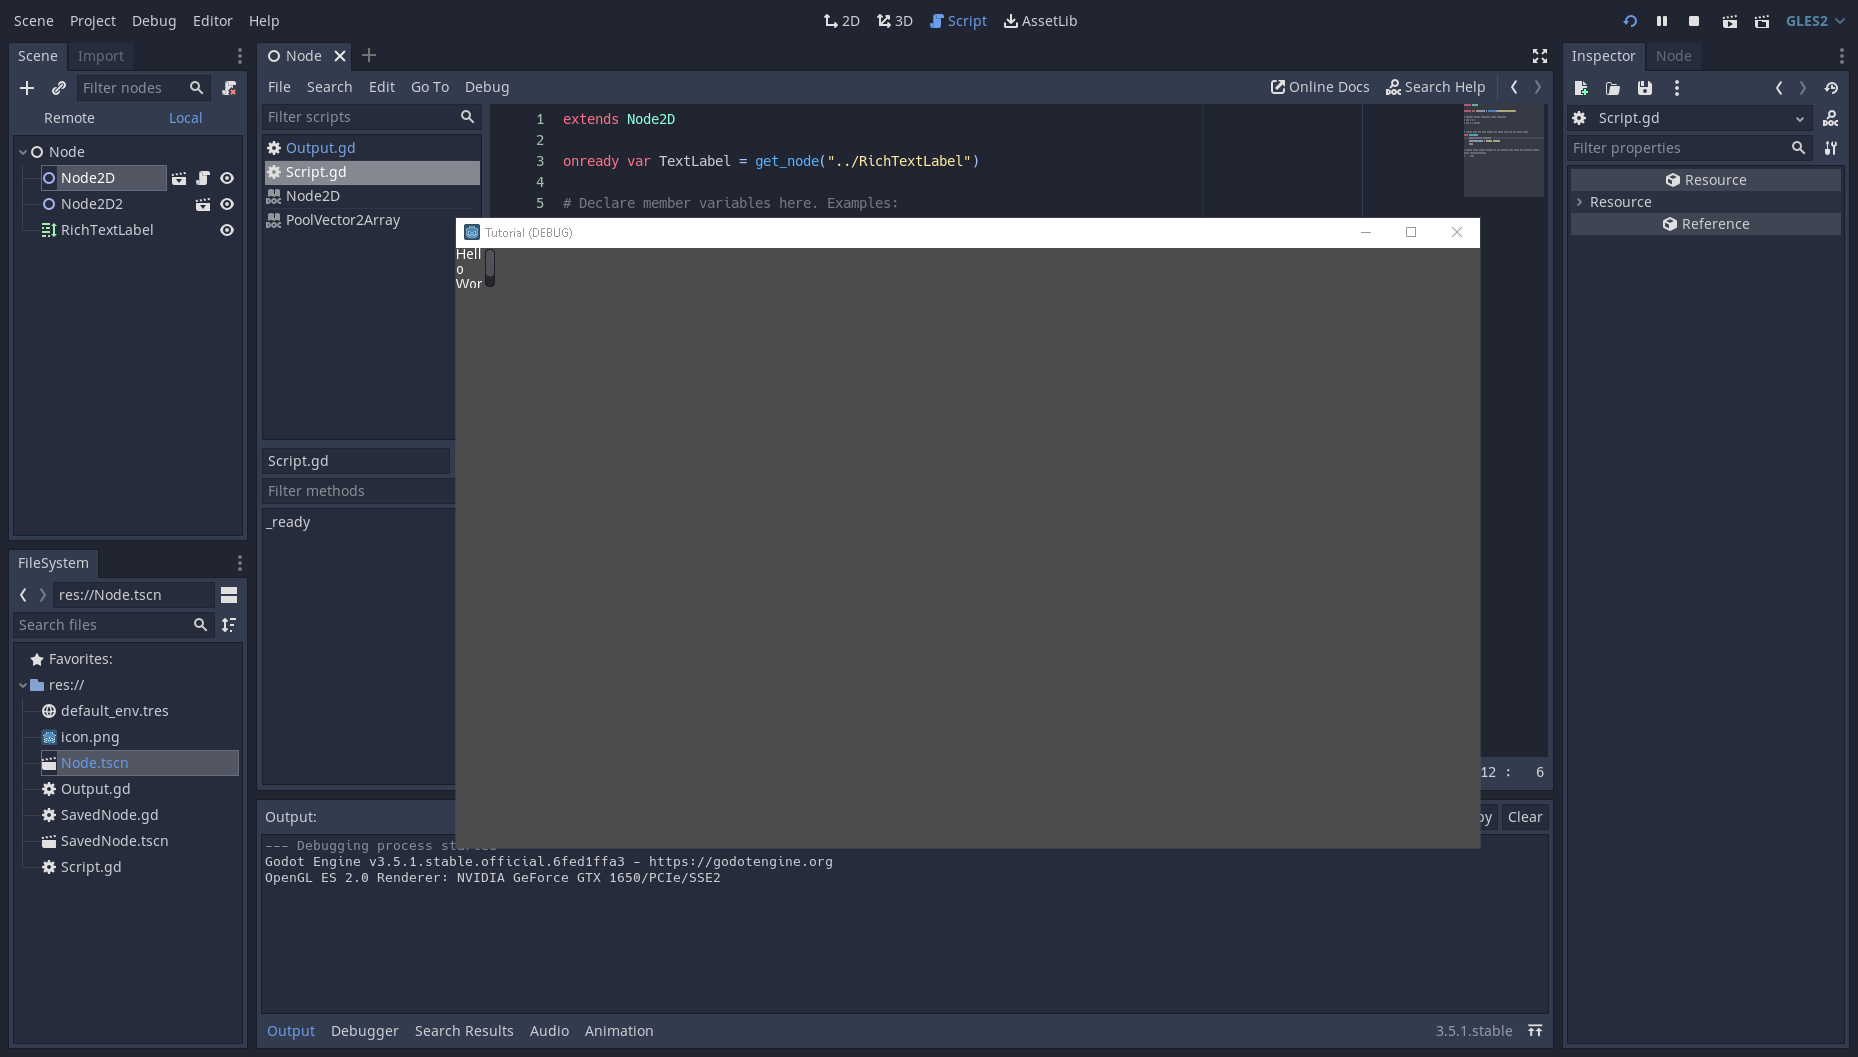
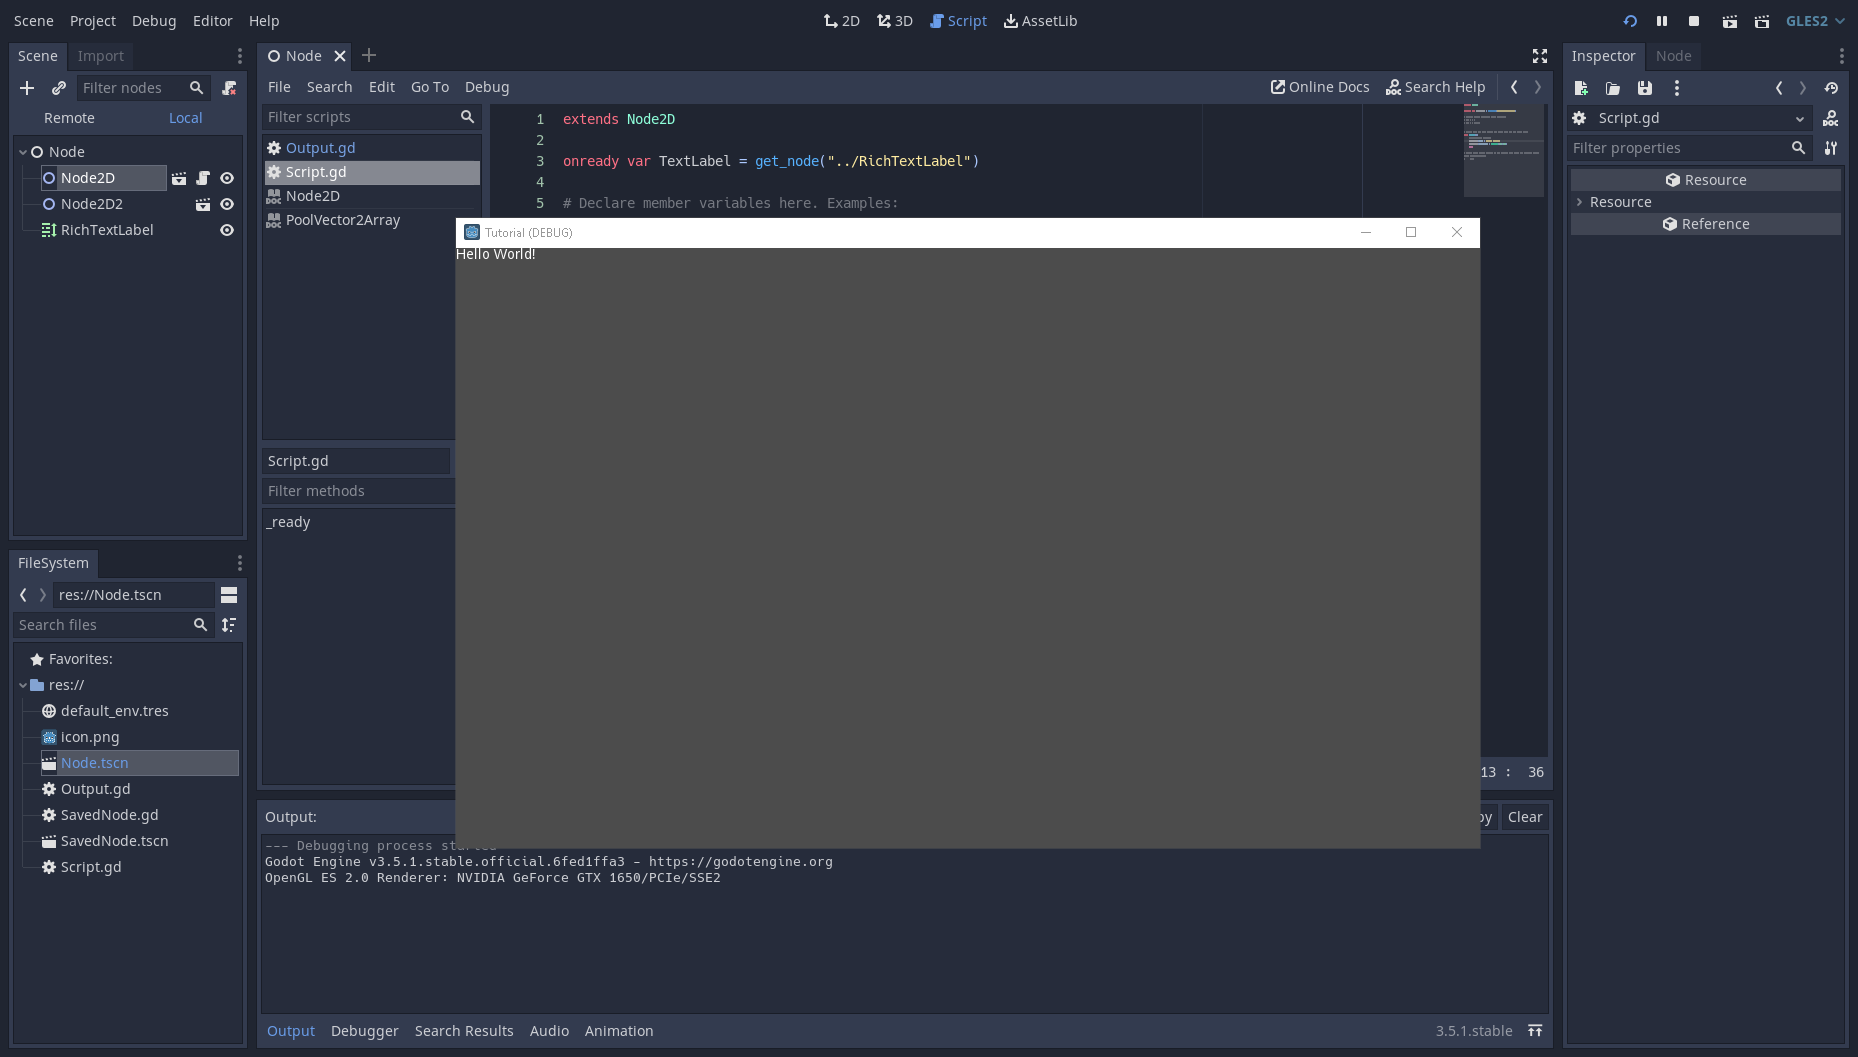
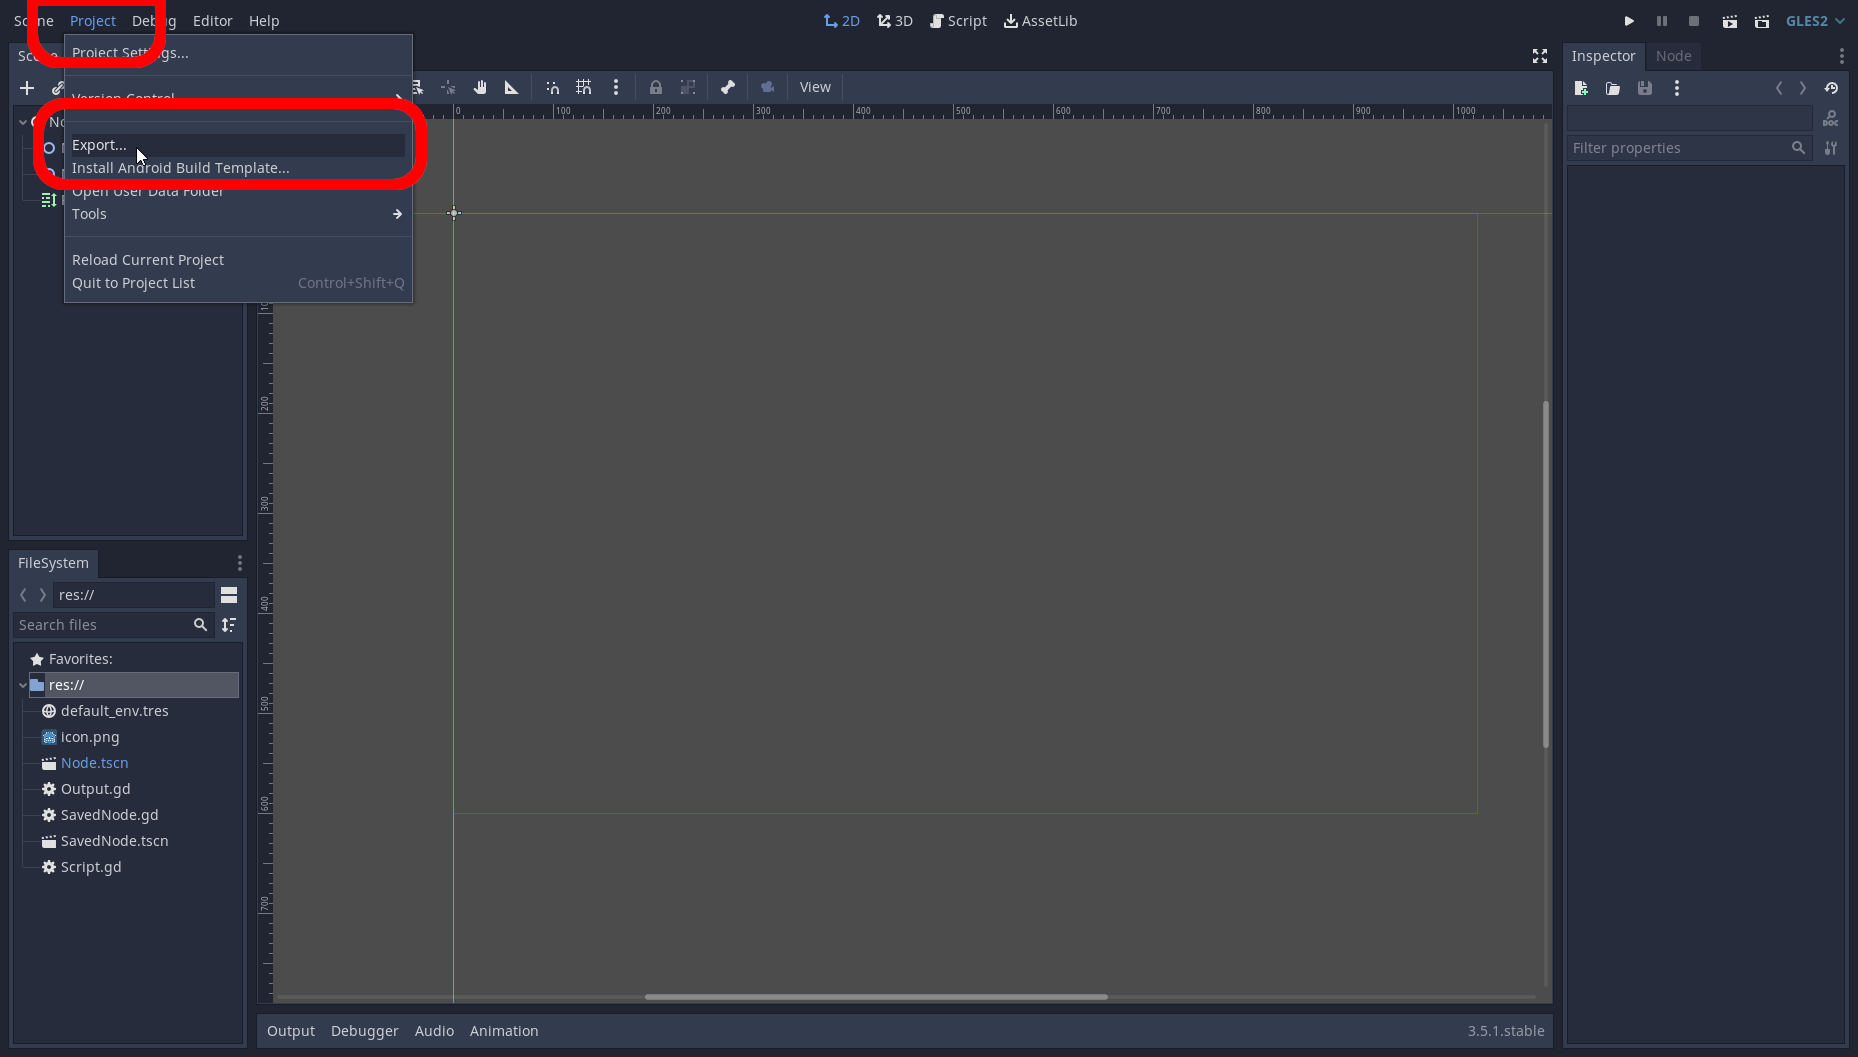
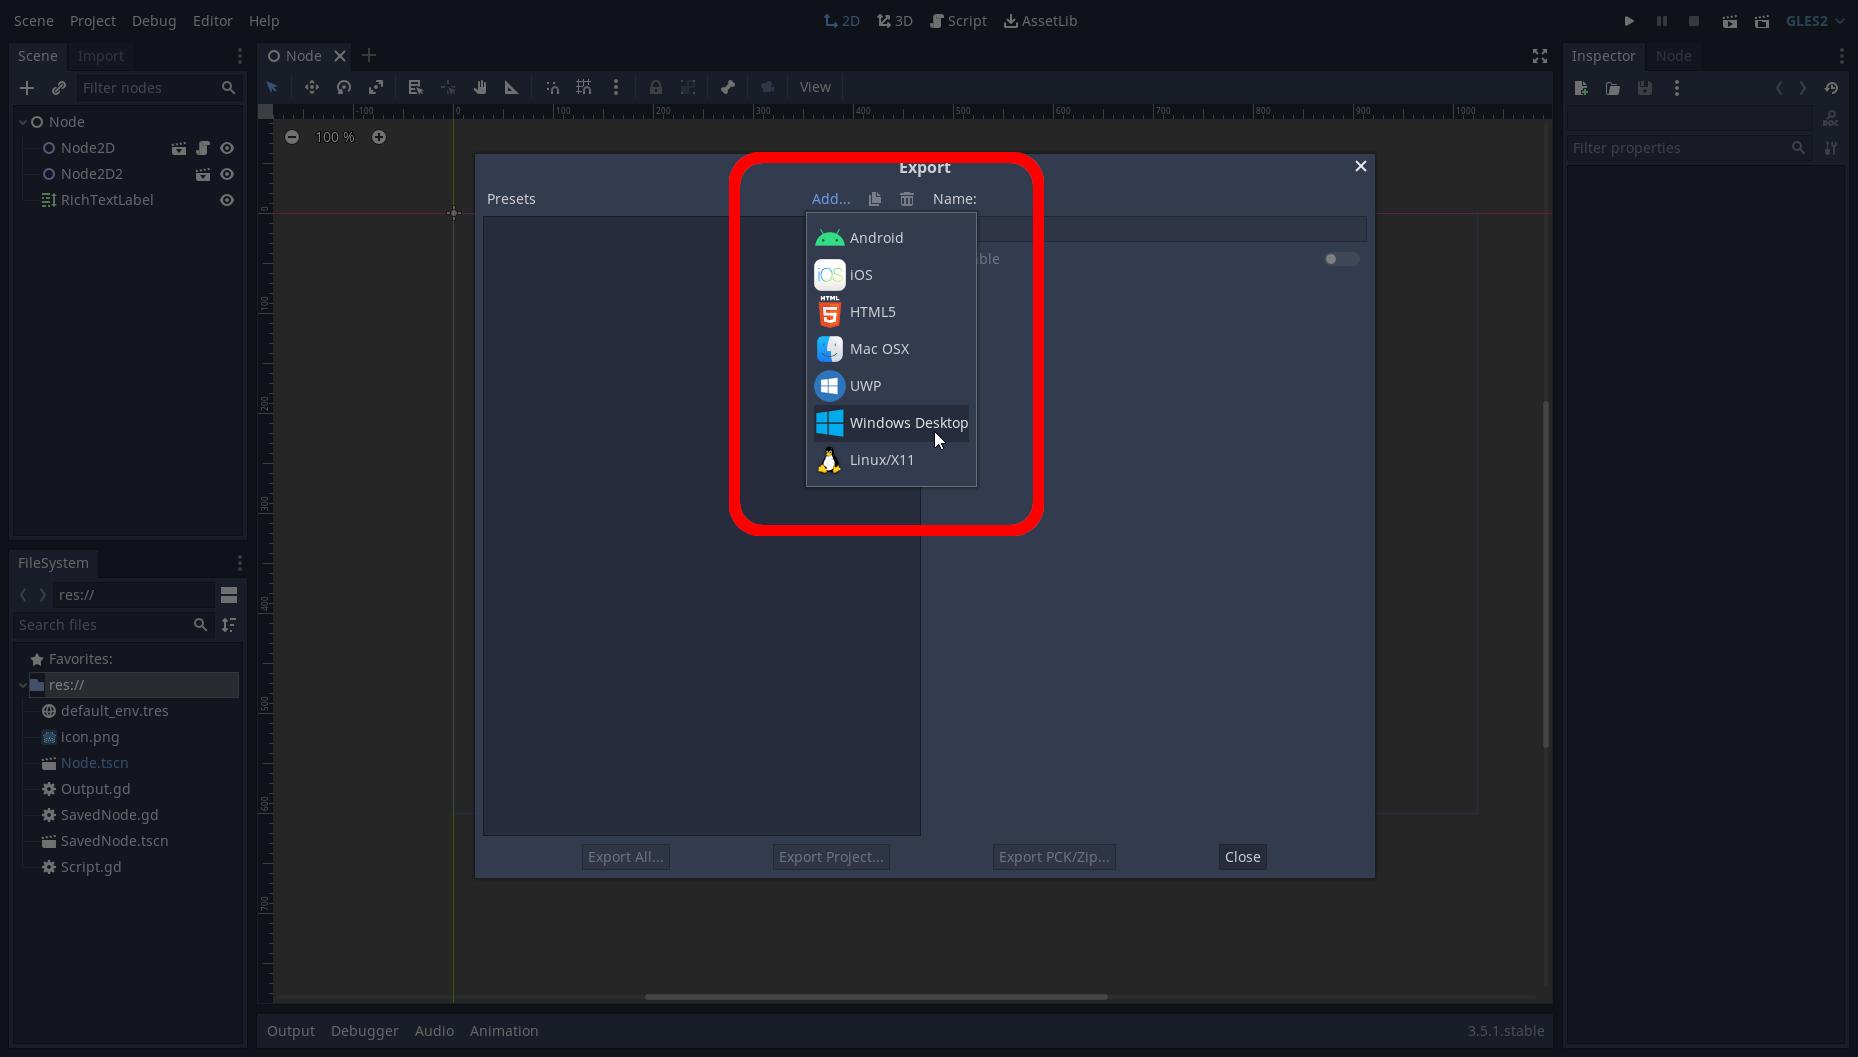
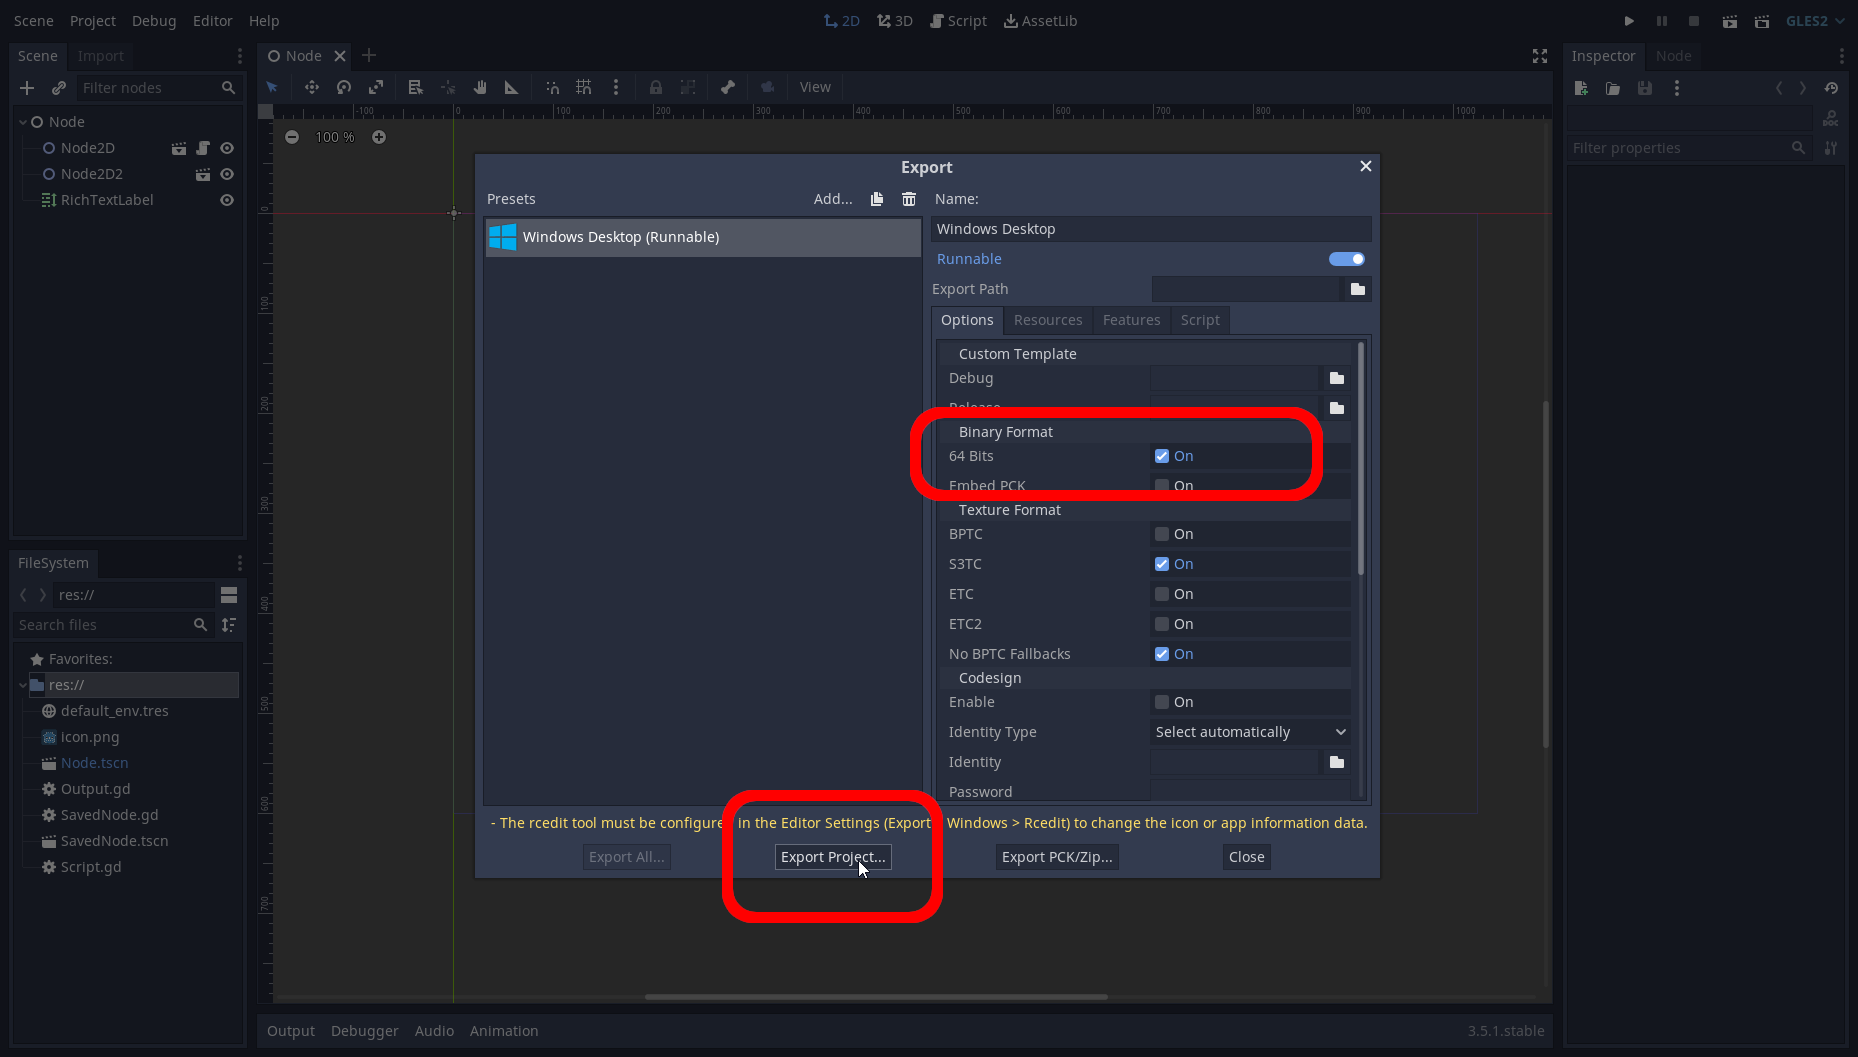
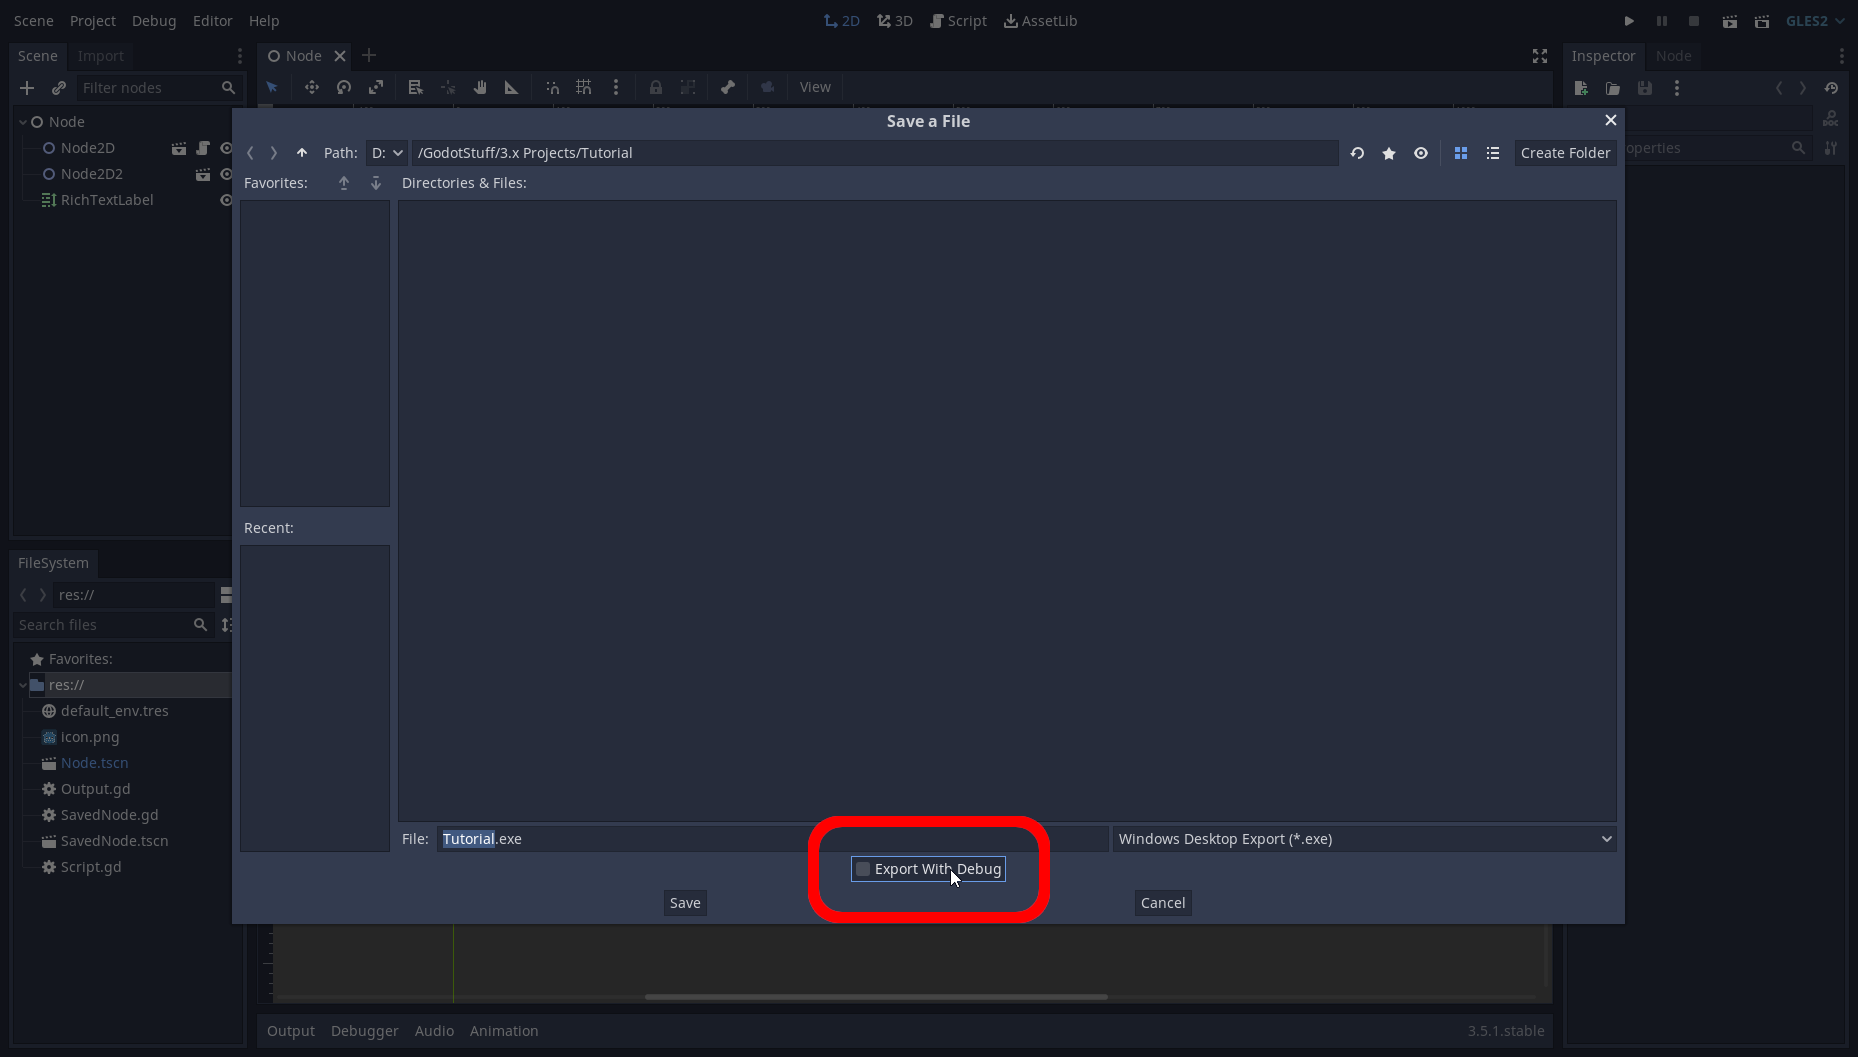
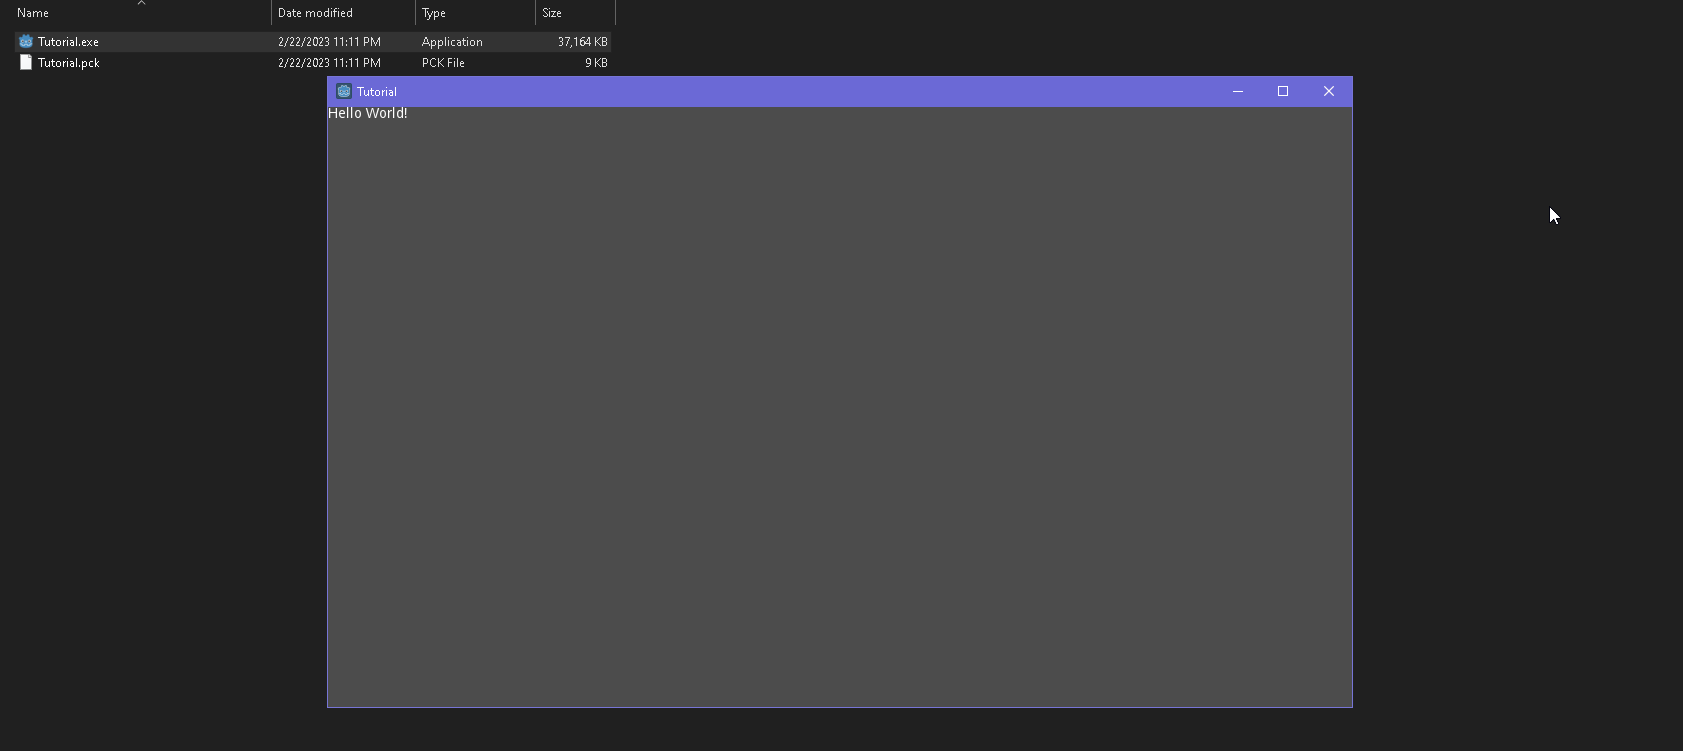
So, we have our game, what's the point after this? Running and exporting our game! These two things are essential to testing, and releasing a game using Godot. >> Running from the editor >> Visualizing Data >> Exporting Results Running from the editor So the code we wrote in the last tutorial will be important for this section. As we're going to be using the code written as a way to show our script is actually working. So if you missed it, this is the major change we made to the default script:func _ready(): print("Hello World!") passContinuing onward, we're going to want to locate the tiny panel in the top right, with a few buttons. In order from left to right, these are: > Play: Runs your game in a testing environment. > Pause: Puts your game "On hold", and can be unpaused. > Stop: This is a full hard stop of your game, when your game crashes, it usually will trigger this. > Scene Play: This runs your game from the currently selected scene in the tab bar. > Custom Scene Play: This allows you to select a scene to start at and then run it. > Engine Type: This is for if you want to change between GLES-2 or GLES-3. This is really only used if you have an issue and want to see if it's resolved on one or the other. Or if your project switches directions and you want to access more or less. That being said, now we're gonna try running our game, so we're going to want to press the play button. What's this? It's asking for a scene to use? Well, we have the one that we saved to use for instancing... but we don't have one for our game to run. So how do we do that? Well we have to first make sure we're in the proper scene. You'll want to go up to the top bar just under the view buttons, and click the first one that says "Node", or whatever you used as a basis for your project! You may notice the (*) next to it, this is to let you know that this is an unsaved scene. So, to resolve this we're going to want to go to the top left corner, where it says "Scene" and find the "Save Scene As..." option. The menu that pops up should be fairly familiar assuming you saved your Node2Ds from before. So just look for a place to save it, name it whatever you'd like that you'll remember. Alright, cool. So now, we'll want to press the play button again. And this time we'll want to press "Select Current" or, "Select", if you'd like to make sure you're running from the scene we made just now. Next, after a few flashes, you should be greeted with something that looks like this: Congratulations! You've made your game run! You'll also possibly notice, in our output console, there's the text we had it print! This verifies that our project is actually running properly, and that we don't have to go much further! Next, we'll learn how to make this kind of text visible within an export, as we don't have access to the output console if somebody else runs our game. Visualizing Data The next section I wanted to do, was to just go straight to exporting, but as I said before, we don't have access to the output console, which means, we'd just be looking at a blank screen with no results. So, we're going to set up a little text system so we can visualize it from the game itself. To do this we're going to want to go back to the "2D" tab found along the top of the engine window. From here we're going to want to make a new node by pressing the "+" button in the corner again. This time around, we want to make a RichTextLabel . The RichTextLabel node is good for adding text in large quantities, we can also make it do effects, and even color it if we so desire. The reason we're going to use it in this instance, is because we're going to add more than one response to test our code with! Now that we have it in the scene we can look over in the "Node" tab to the right of the screen. We can add text here, or, if you scroll down, you can see that you have the option to enable BBCode. BBCode is our way of adding effects and colors and such, so we're going to want to enable it! Now that we have that, lets go back to our script tab, the Node2D we have doesn't have access to the RichTextLabel currently, so we're going to make it do that! Just under the "extends Node2D" we're going to want to add the following:extends Node2D onready var TextLabel = get_node("../RichTextLabel")This seems a bit complex, but lets break down what it's doing. onready is a keyword for variables, it's essentially saying, once the following node is ready, look for this node. get_node() is Godot's method for finding a specific node that we'd like to access, so that we can adjust or edit it. The stuff inside of the get_node, "../RichTextLabel" is a string, this is being used as a NodePath, the "../" is saying go back to the parent, and then look for the node named "RichTextLabel". An alternate version of get_node is using the $ sign, which is a shortcut essentially, so rather than writing get_node every time, so it would look more like:extends Node2D onready var TextLabel = $"../RichTextLabel"This is an advanced technique however, so we should stick to just using get_node() for now. Moving on. Now that we have this variable, we can use the functions that node contains, or access its variables. So under our _ready() function, we're going to want to change our text slightly. Instead of print(), we want to just set the text in the RichTextLabel to "Hello World!". This would look a little something like this:func _ready(): # print("Hello World!") TextLabel.text = "Hello World!" passSo, in doing so, we've now commented out our print statement, but we are setting the "text" variable built into the RichTextLabel with our chosen text. If you try pressing Play, the RichTextLabel should show our text now! Hrm, It looks a bit squished. Let's try adjusting the size of this so it has some space to show!. The RichTextLabel uses Rects, these are essentially a box that we can change the size of, we'll want to adjust rect_size in this instance.func _ready(): # print("Hello World!") TextLabel.text = "Hello World!" TextLabel.rect_size = Vector2(100,100) passSo Vector2, this is a new thing we've not seen yet. A Vector2, and aptly, a Vector3, are the dimensional coordinates in some capacity in a given space. Vector2 contains Vertical, and Horizontal, or X, Y. Vector3 contains Vertical, Horizontal, and Depth, or X, Y, Z. So if we press play now, you should see our text is no longer squished! Huzza! Godot auto saves every time you press the play button, but make sure to save your progress reguardless regularly! Exporting Results So now that we've got something that we'll be able to see from within our game. We're going to want to export our project! You'll want to go to the top corner to the "Project" tab and select "Export..." Seems easy enough. This will open up our export menu! Feel free to choose whatever you'd like to export to, I personally use windows, so we'll be going that route in the tutorial. I would recommend if you're on linux to export to linux, or MacOS to export to that, as it will make it easier to run. You can do this by pressing "Add..." Another thing we'll want to check, is if our OS is 32bit, or 64bit, most computers are 64bit, so we'll keep it ticked, but some may not be, so you may have to disable it. After that, we're going to want to press "Export Project...". This will open a new dialogue asking where you'd like to save your exported files. From here we'll save the project in a new folder outside of our project folder, or we'll run into an issue with the project being imported inside of itself. When you do this, it's important to also turn off "Export Debug" as this will make your project be alot bulkier, but is useful if you know how to use it. Now that we've exported it, lets go to that folder! Assuming you're on windows, you'll just have to double click the .exe in the folder, and your game should open! Mine looks like this: Now we have a game we can zip up and send to whoever we want and show them the cool thing we made! You now know the very very fundimentals of Godot 3.x! Good job and thanks for following this tutorial, there will hopefully be more in the future, but this is a start for me! If you find yourself having any issues, or need any help, feel free to join the Discord! Or, if that's not your speed, try out the Official Godot Community List for help in a place you'd be more comfortable! Otherwise, I wish you well on your journey to becoming a game developer, make something cool, fun, and what you enjoy! Hope to see you soon!
Prev <
|| > Next
