Basic Godot Engine Setup
Created: Feb 17 2022 || Edited: Feb 22 2022
Created: Feb 17 2022 || Edited: Feb 22 2022
Engine Setup
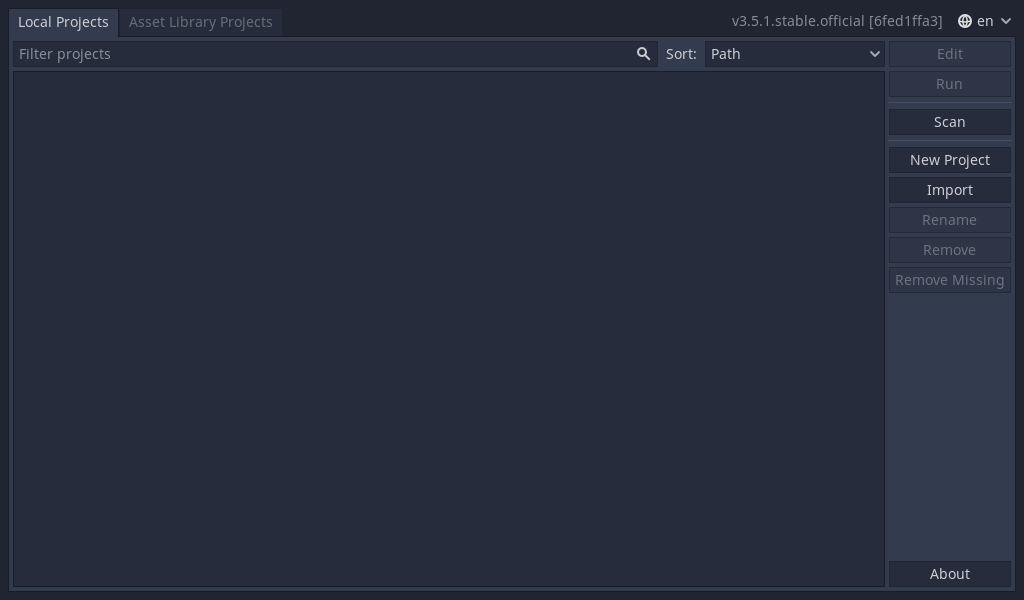
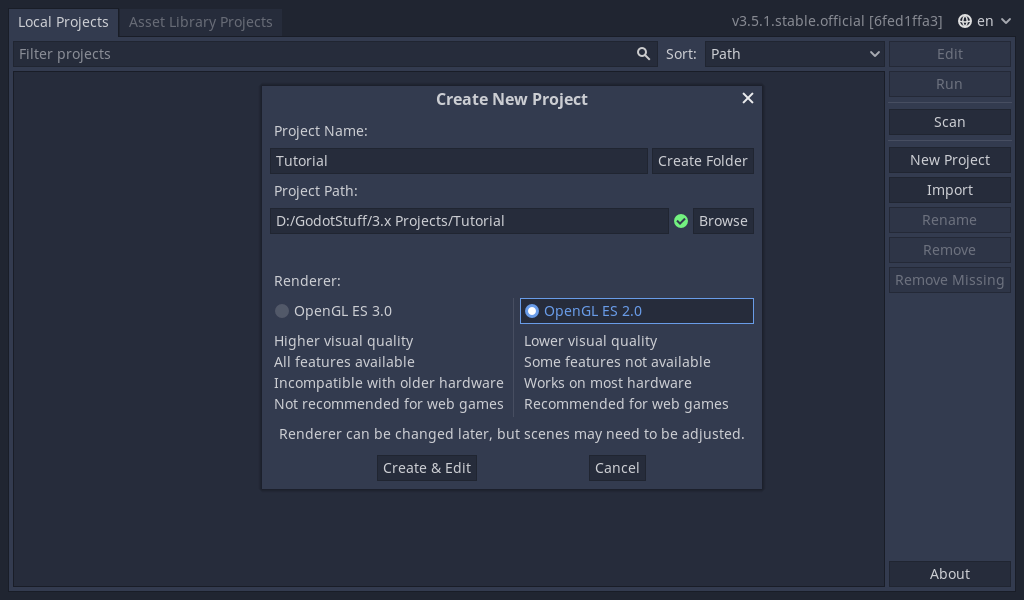
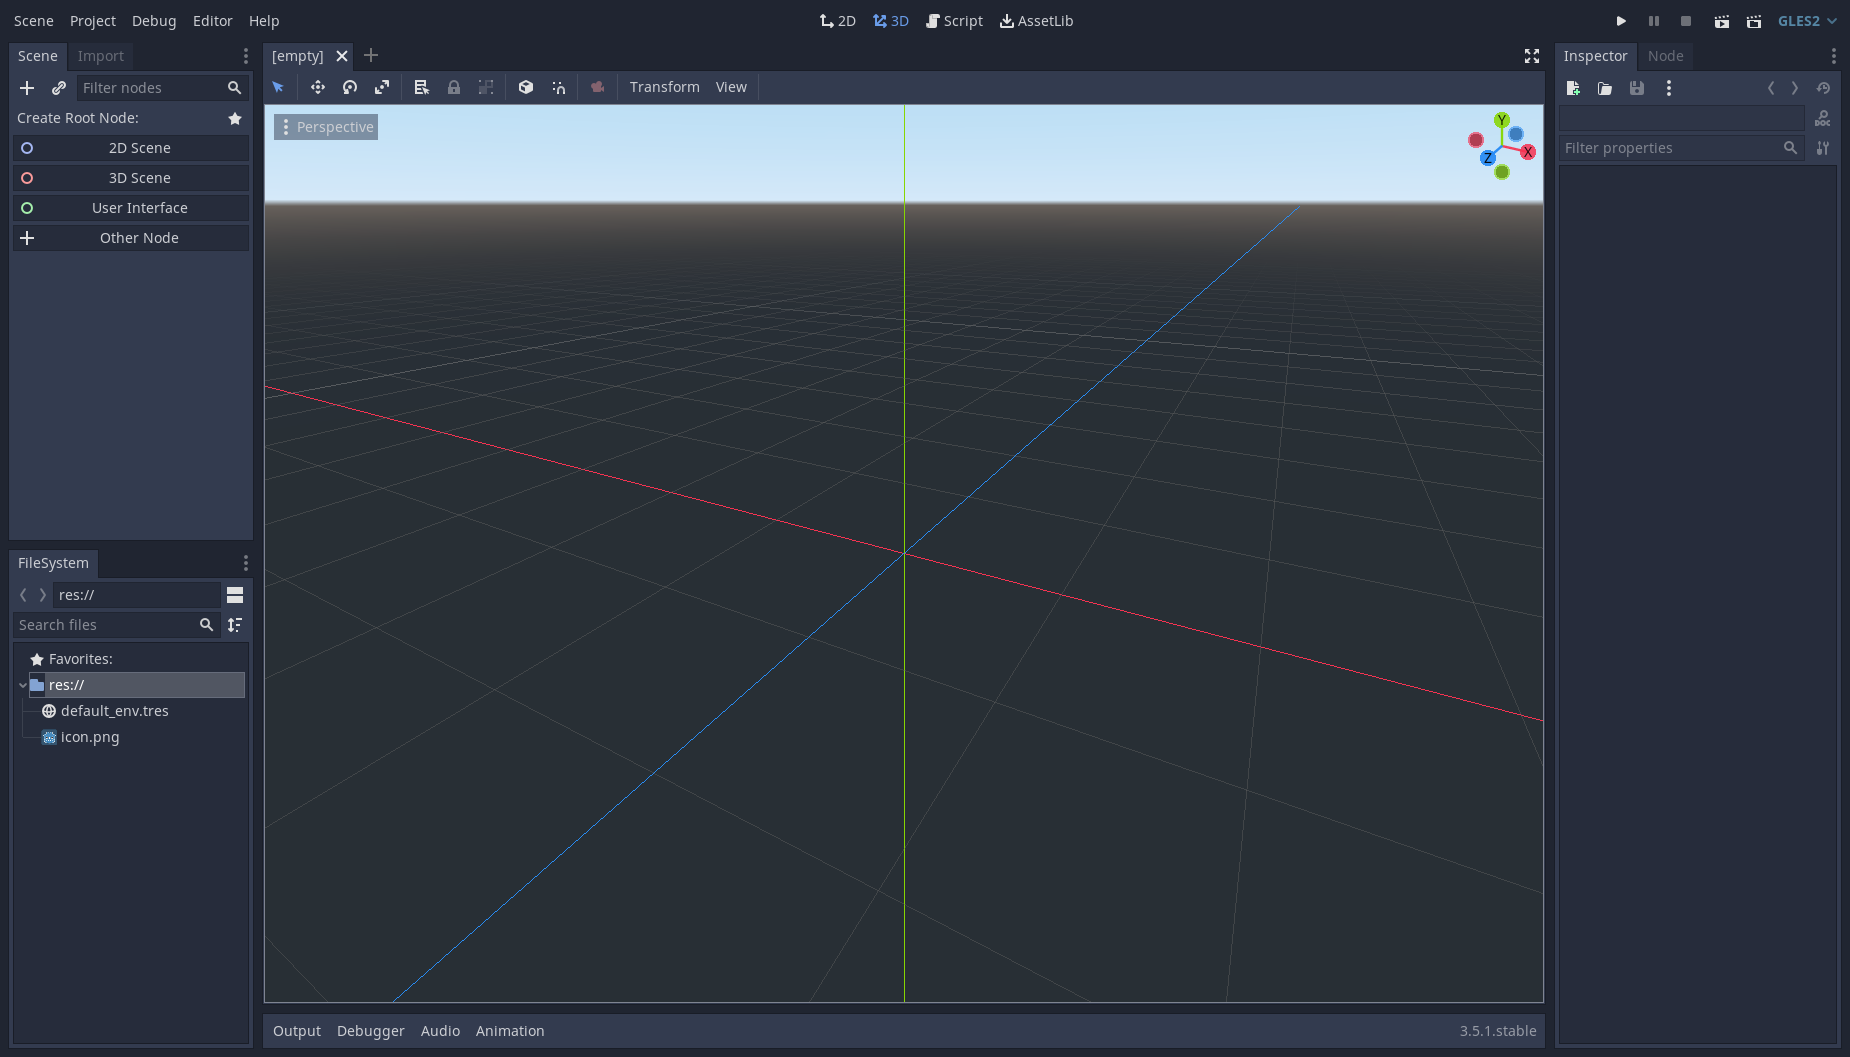
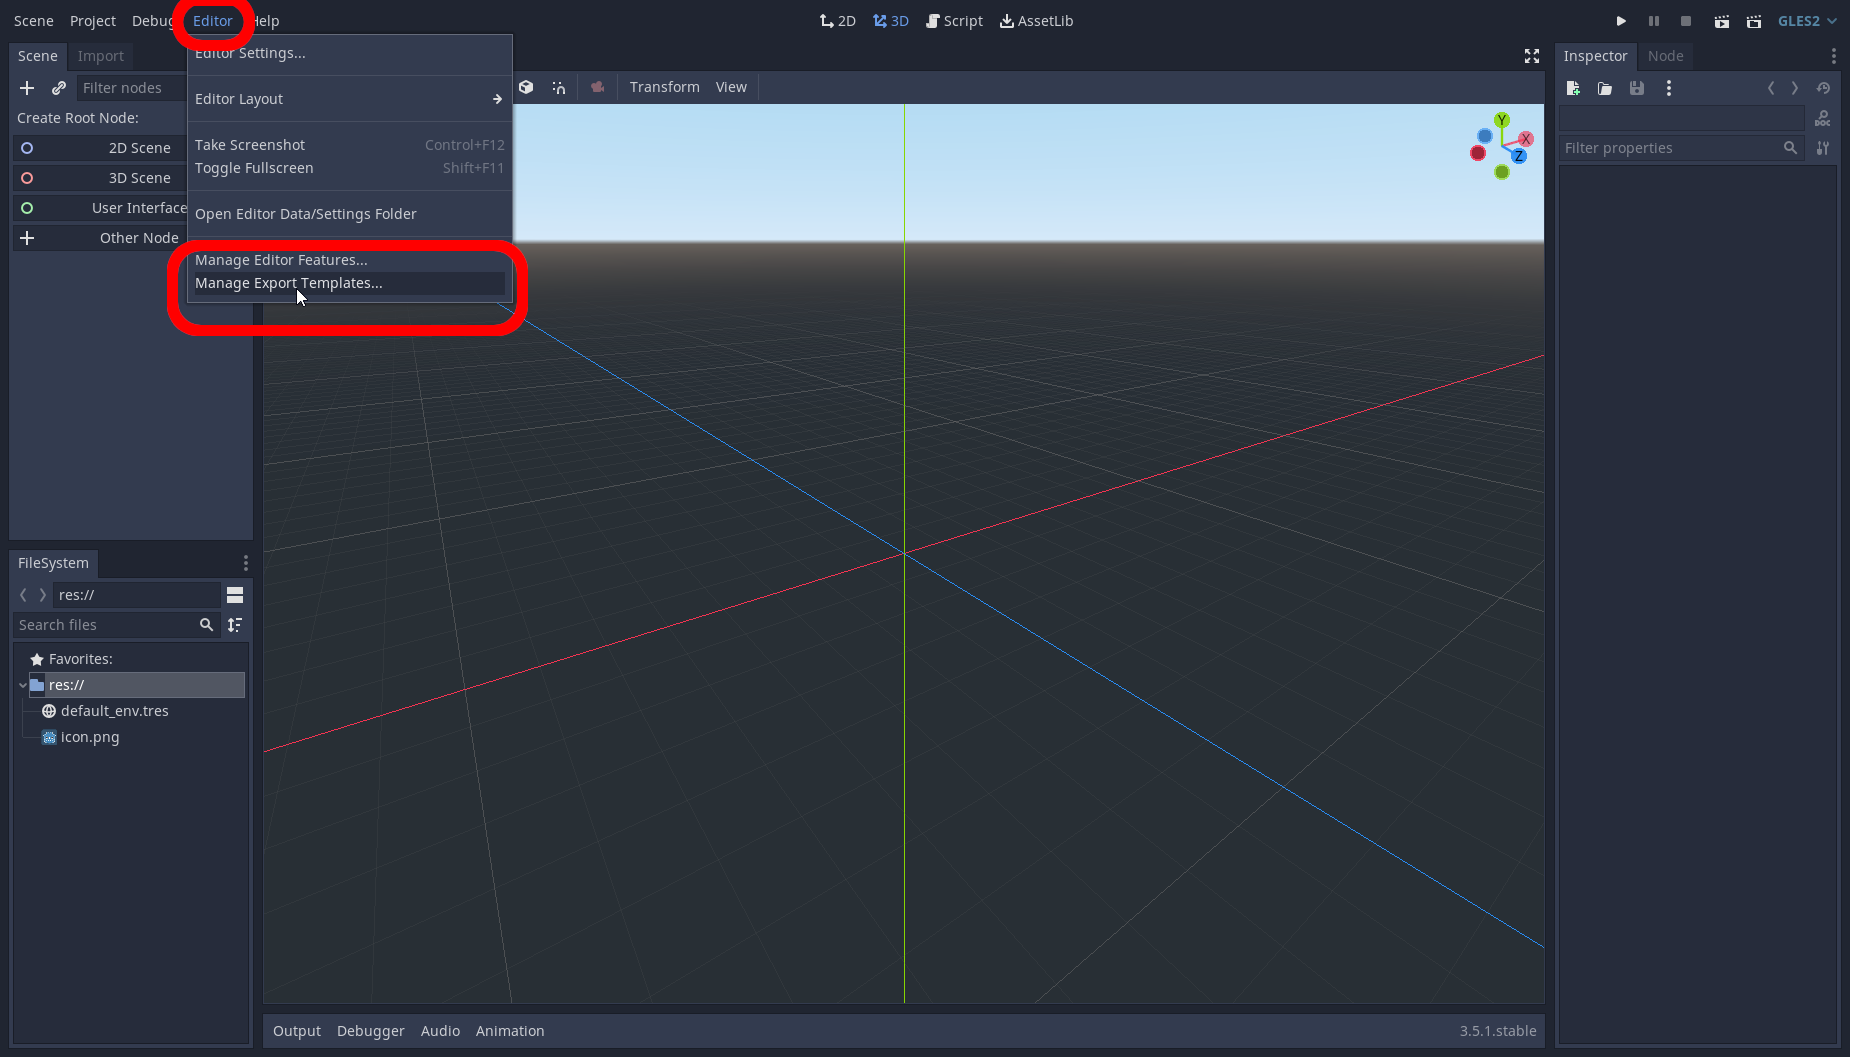
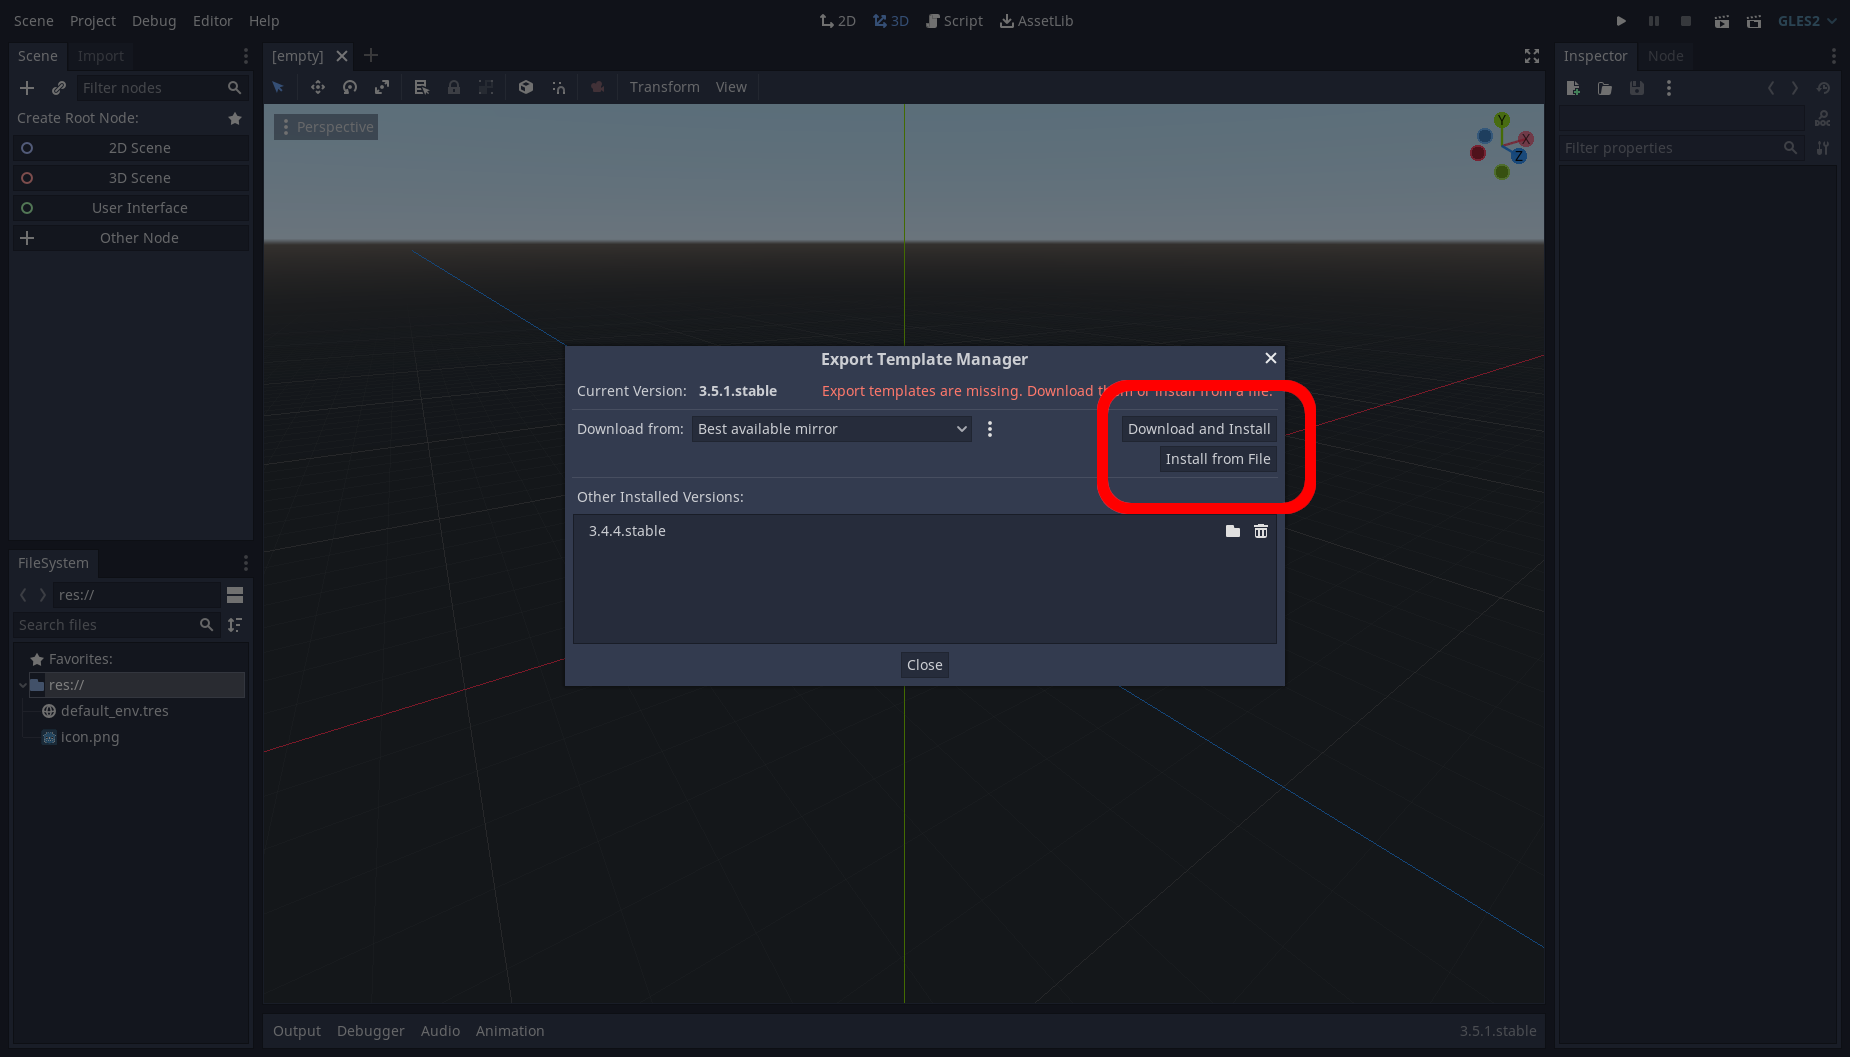
So, you've likely downloaded Godot for your platform at this point. If not, here's a link to it: Godot Engine Website I would personally also advise downloading the export templates while you're there for later, but in the event you don't, no worries, we'll cover that a bit later. >> Initial Screen >> Creating A Project >> Adding Export Templates Initial Screen That being said, let's open the actual executable, all of them should use the same main screen layout, so that's convenient for us isn't it? So before we get too far ahead, lets explain what's actually on this screen. Along the top: > Local Projects: All the projects that have been scanned from your computer, including downloads. > Asset Library Projects: A curated library that allows for pre-made games/projects/assets to be downloaded. Along the side-bar: > Edit: Open the selected project to edit. > Run: Run the selected project without opening the editor (!!This is not an export!!) > Scan: Scan a folder on your computer for possible projects. This is good for importing a backup folder of projects. > New Project: Create a new project. > Import: Similar to scan, but only opens a single project. > Rename: Rename the selected project. > Remove: Remove the selected project. (3.5+ allows for deletion of files as well) > Remove Missing: If Godot loses track of a project, it goes missing, this removes those "ghost" projects. And that's pretty much it for that menu, now let's move to actually creating a project. Creating A Project So now that we know what the funny buttons do, let's actually make a project we can use, first we're gonna want to click the "New Project" button, and you should see the following window: So, this is how you make a project, let's explain how to use it: > Project Name: What do you want to name your project? > Project Path: This is where your project is stored on your computer, it requires an empty folder for Godot to generate the default project files inside. > Renderer: The renderer your game will be using. For 3D games, I recommend 3 for better shadows/visuals. For web games, I recommend 2 for optimization. > Create & Edit: Will create the project, and open you to edit it. > Cancel: Closes the window and takes you back to the project window. Now that we know how the buttons work, I'd recommend making a project, you can store it wherever you'd like, and open it so we can move onto the next area! Adding Export Templates So you'll be greeted with the main engine interface, this is where you'll spend around 80% of your time working on projects. In the next section we'll explain the actual engine interface, but for now we'll just show you one of the steps you should take if this your first time opening the engine, that being, adding the export templates. You may be asking "What are these used for", and to answer that question, they're used to export games to different platforms, such as windows, android, linux, mac, etc. We'll talk about exporting your project later. That being said, we have to access the menu for adding them, so go to the top of the screen and press the "Editor" button, this will give you a drop down menu, for now you just need to click the "Manage Export Templates" button. So after clicking it you'll be shown a menu for importing the templates, the only thing you really need to know, are the "Download and Install" and the "Install from File" buttons. Assuming you've downloaded the templates recommended at the beginning of the tutorial, you can click "Install from File", and navigate to where you downloaded them to. (Usually your download folder) If not, don't worry, you can click "Download and Install", and Godot will automatically grab them off the internet for you, and install them. And there you go, that's Godot set up for you, in the next portion, we'll be moving to how to use the editor, more specifically, an overview of nodes, and what you can do with them.
